- Setting up verification programs
- Verifying user credentials with zero-knowledge proofs
- Handling verification results
What You’ll Build
By the end of this Quickstart, you will have:- A verification program configured for your app
- Code that verifies credentials from users
- Application logic that reacts to verification results (e.g., grant/deny access)
Before Starting, Ensure You Have
- Completed or understood the Login & Sessions Quickstart (recommended but not mandatory)
- Completed the Credential Issuance Quickstart (to have credentials to verify)
- Node.js v18+ installed
- A public HTTPS JWKS URL registered in the Developer Dashboard —
verifyCredentialcalls fail without it. See JWKS endpoint setup.
Step 1: Install the AIR Kit
Step 2: Get Your Partner ID
- Go to the Developer Dashboard and login with your EOA wallet
- Connect your wallet
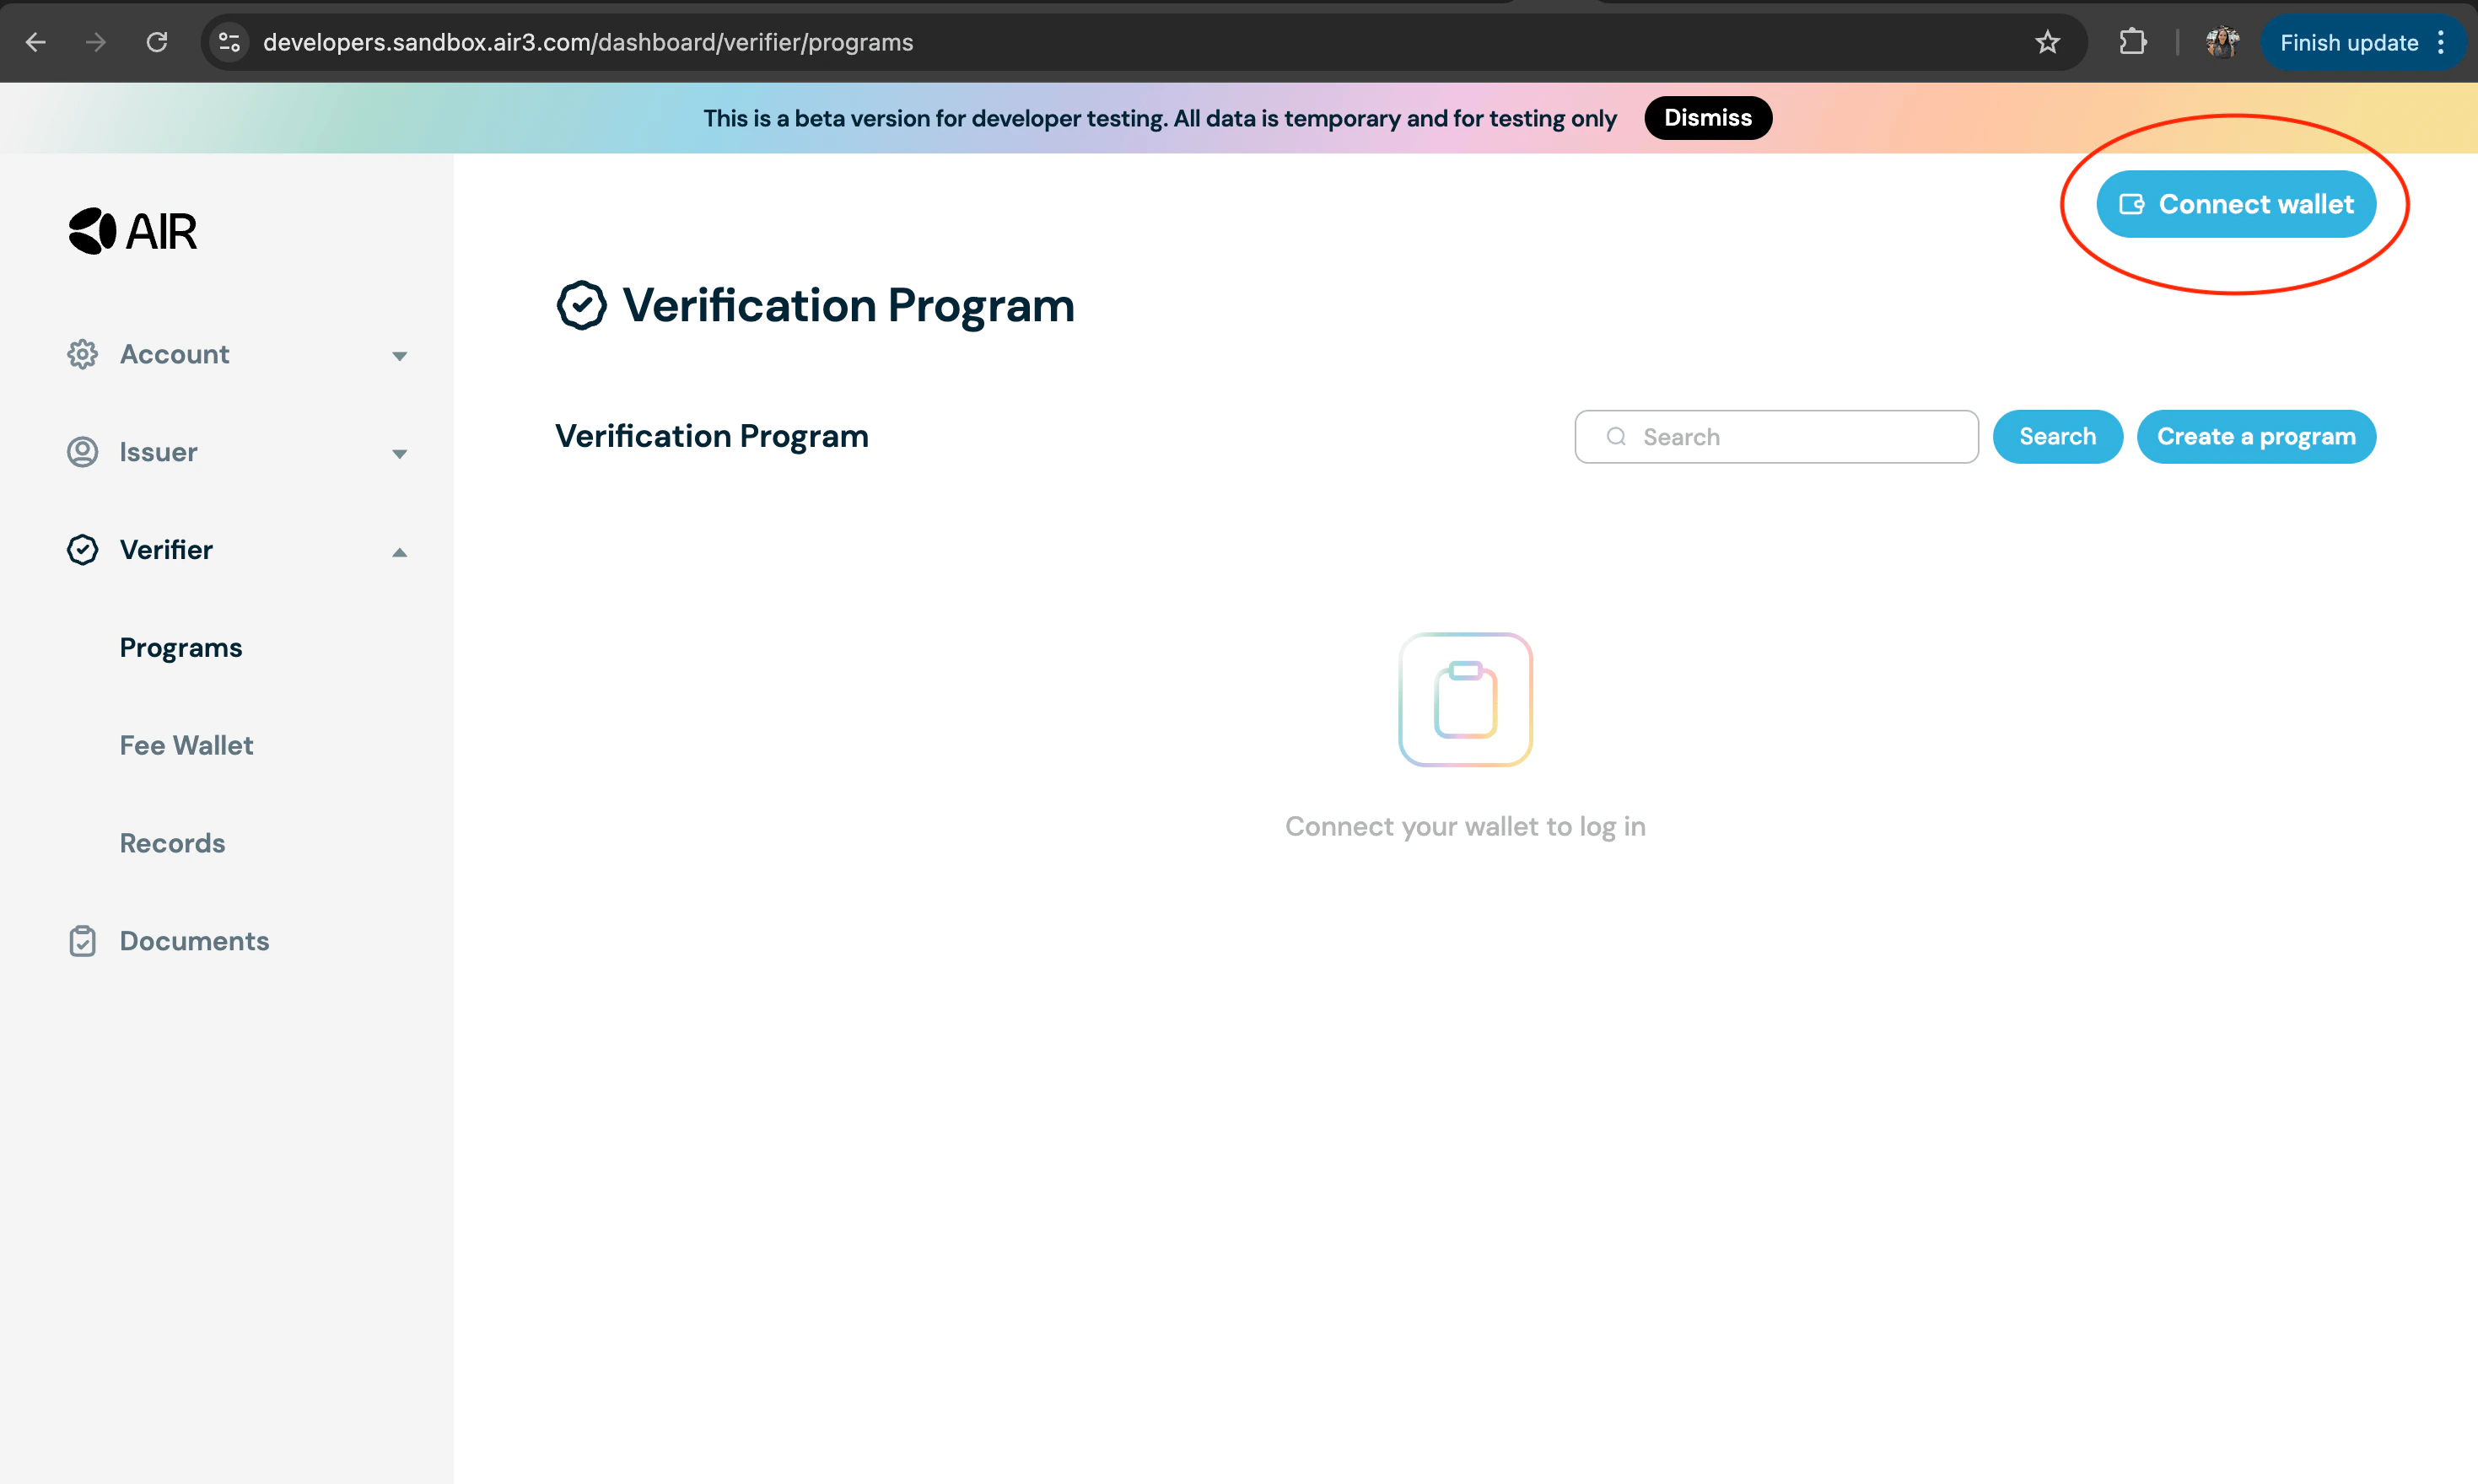
- Navigate to the Accounts section on the navigation bar on the left. Then go to the General section. Copy the Partner ID and Verifier DID from the partner account information and settings

Step 3: JWKS endpoint + Partner JWT (required — blocks issue/verify)
verifyCredential cannot succeed until your Partner JWT is signed with a key that AIR can validate against your registered JWKS URL. This is two pieces of work, in this order:
Step 3a: Implement the JWKS endpoint
Host a public HTTPS endpoint that returns your Partner JWT public key as a JWKS document, then register the full URL in the Developer Dashboard at Account → General Settings → JWKS URL. If your issuer and verifier share a Partner ID, one JWKS registration (typically the issuer’s) covers both — the verifier signs with akid present in that same JWKS.
The canonical Next.js route used in air-examples is app/api/.well-known/jwks/route.ts:
app/api/.well-known/jwks/route.ts
Step 3b: Sign the Partner JWT
With JWKS live and registered, sign your Partner JWT server-side using the matching private key, with akid header that appears in your JWKS. Detailed signing examples for Node.js, Java, C#, and Go are in Partner Authentication.
Step 4: Understanding Credential Verification
A verifiable credential is a secure, digital version of a credential record that can be verified using zero-knowledge proofs. To start verifying a credential, you need to first set up a verification program and question set that validates the proof. Example: Proving age > 18 without sharing full ID. Say you want to enter a bar and prove you are above 18 without showing your ID or sharing your birth date - you can leverage the age credential that was issued. You send the zero-knowledge proof (not your full passport) to the bar. The proof only answers the question: “Is this person over 18?” and nothing more.Step 5: Prerequisites
- Go to the Faucet, connect your wallet, and get $MOCA test tokens
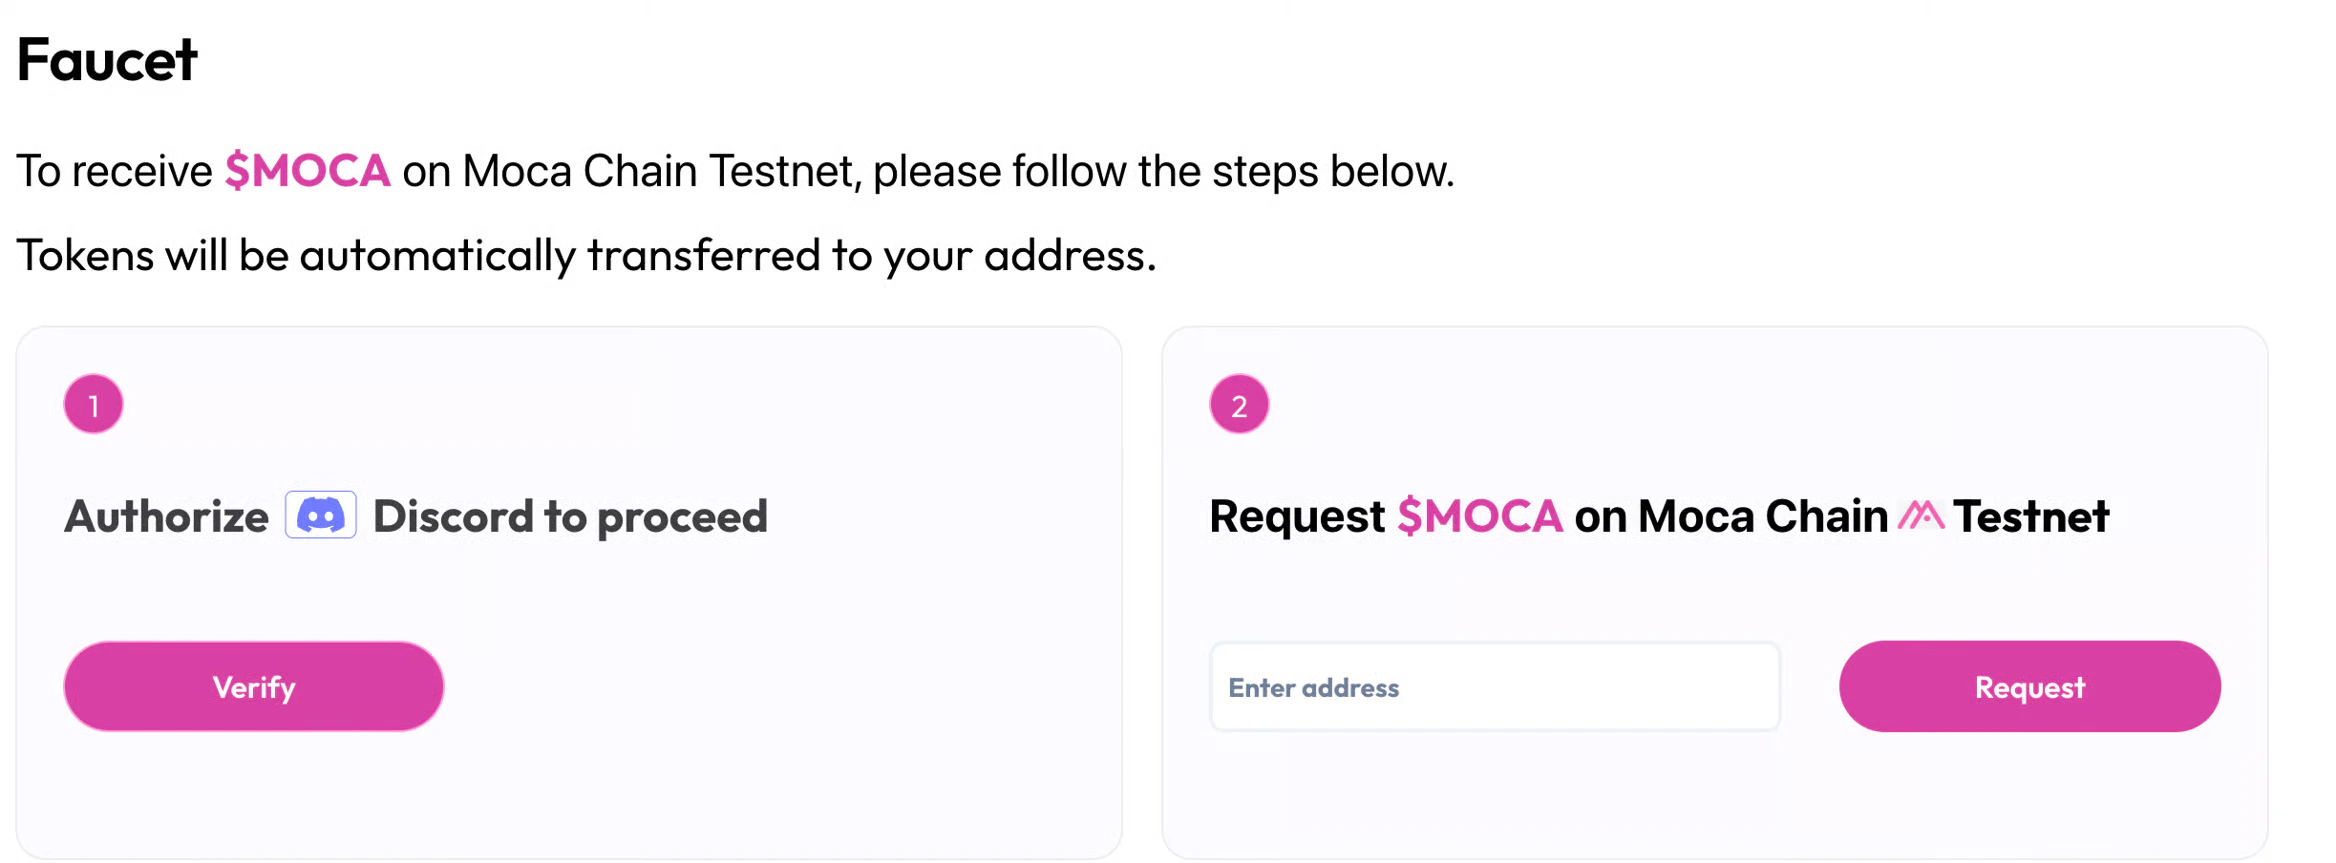
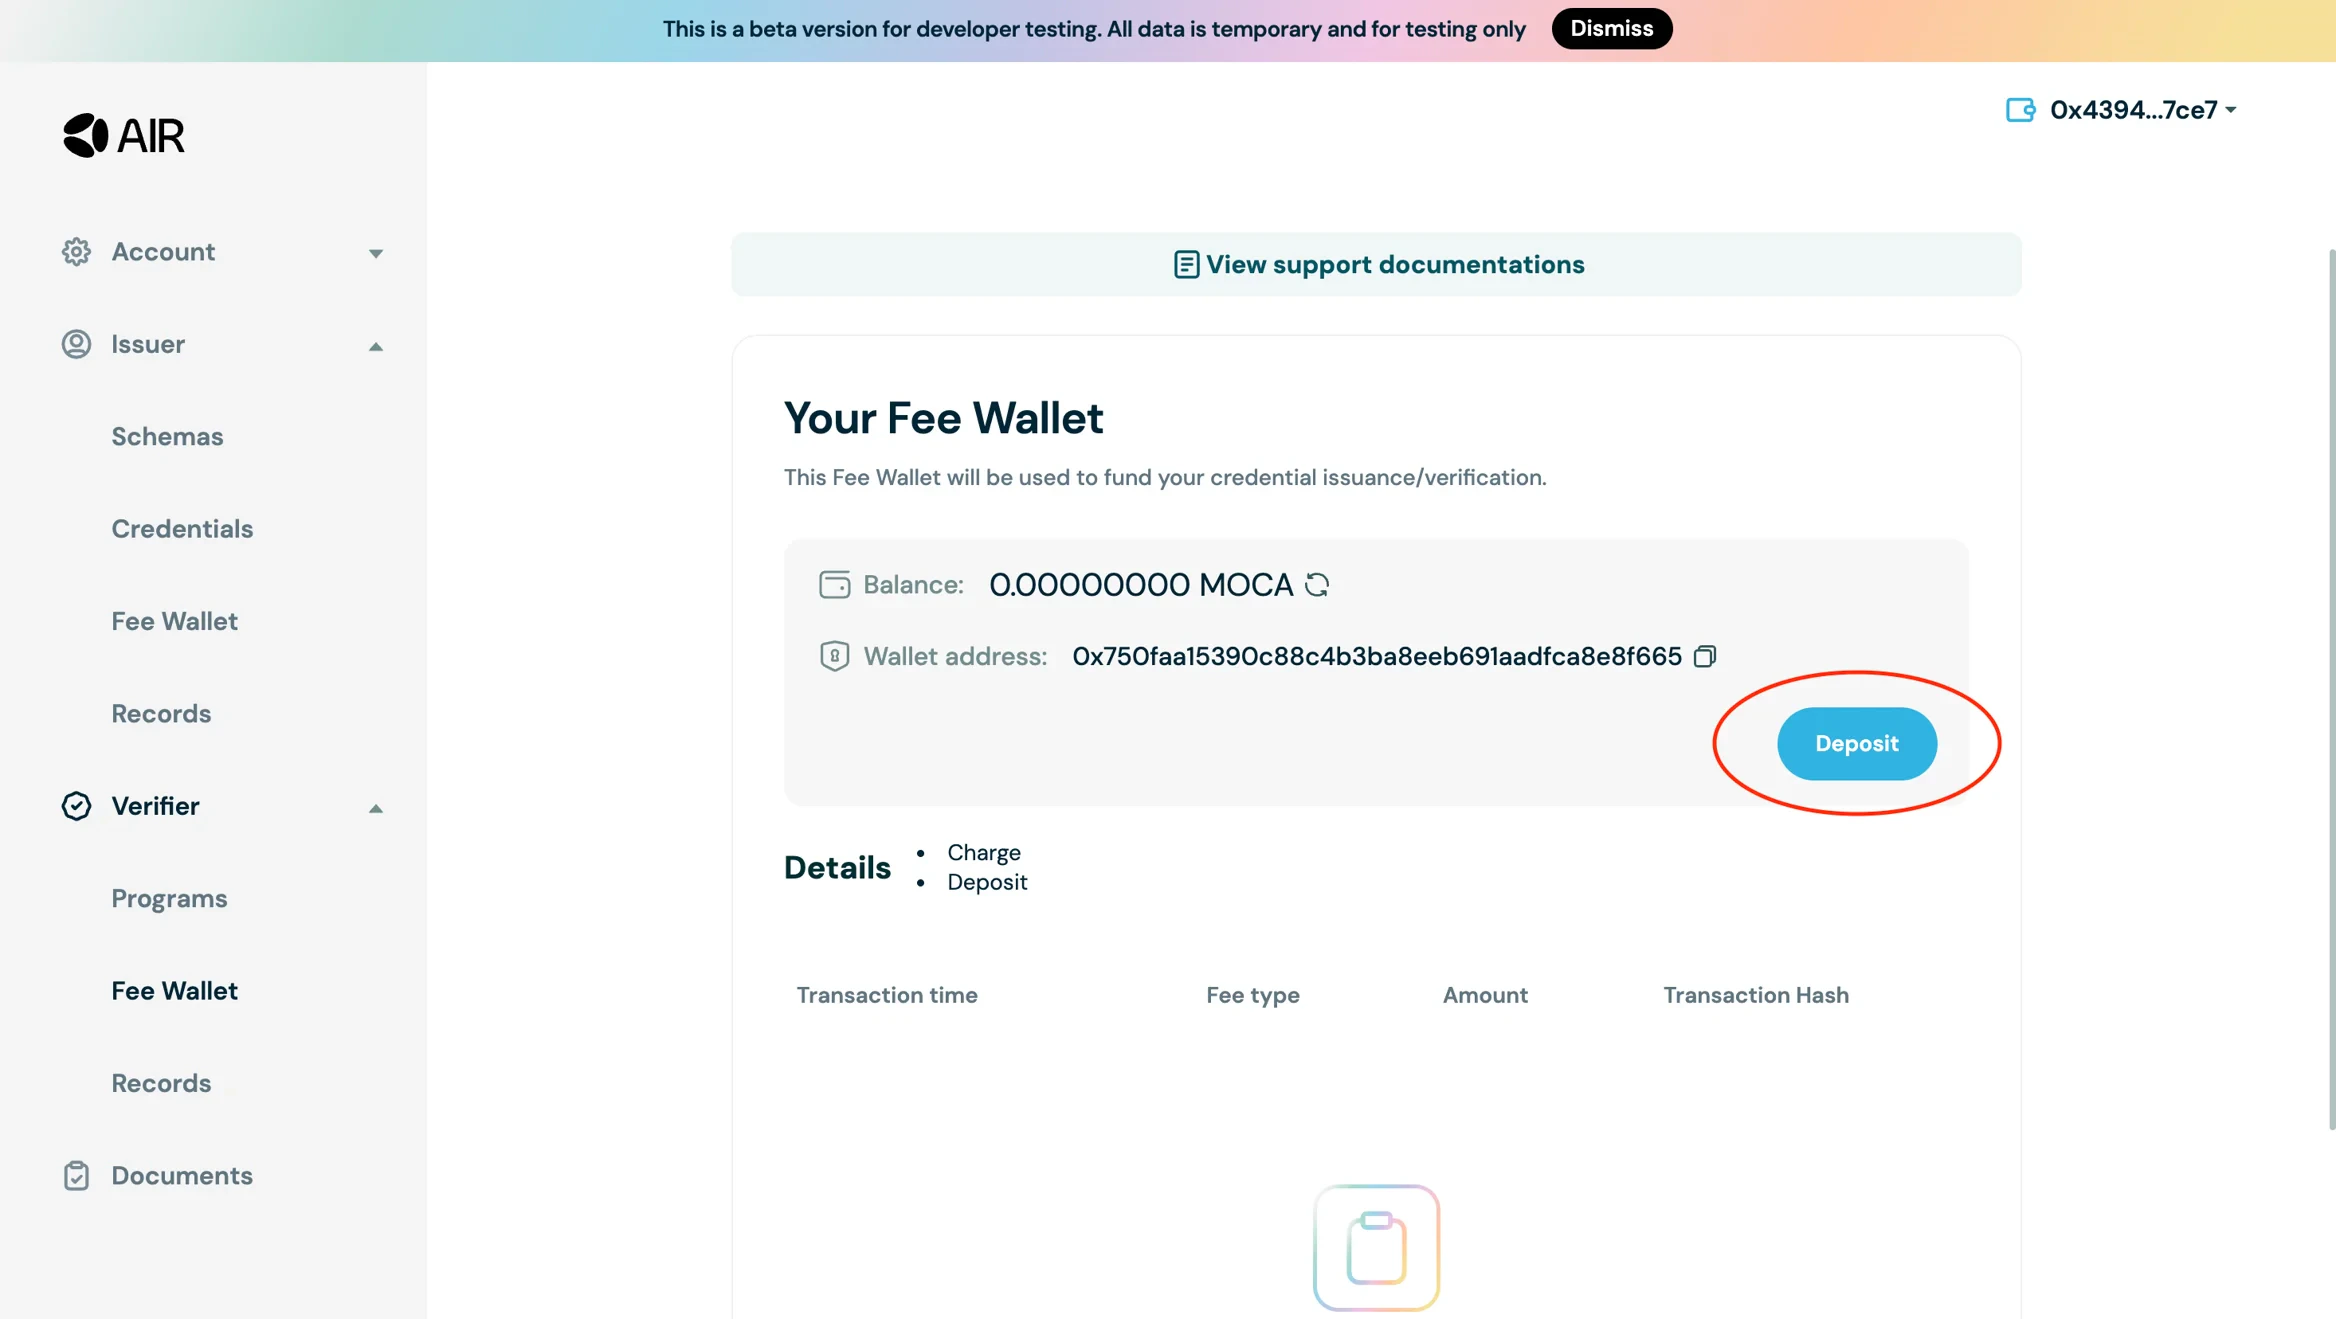
- Go to Developer Dashboard -> Verifier -> Fee wallet and deposit funds
Step 6: Setup Verification Program
- Navigate to the Verifier tab and click “Create Program”
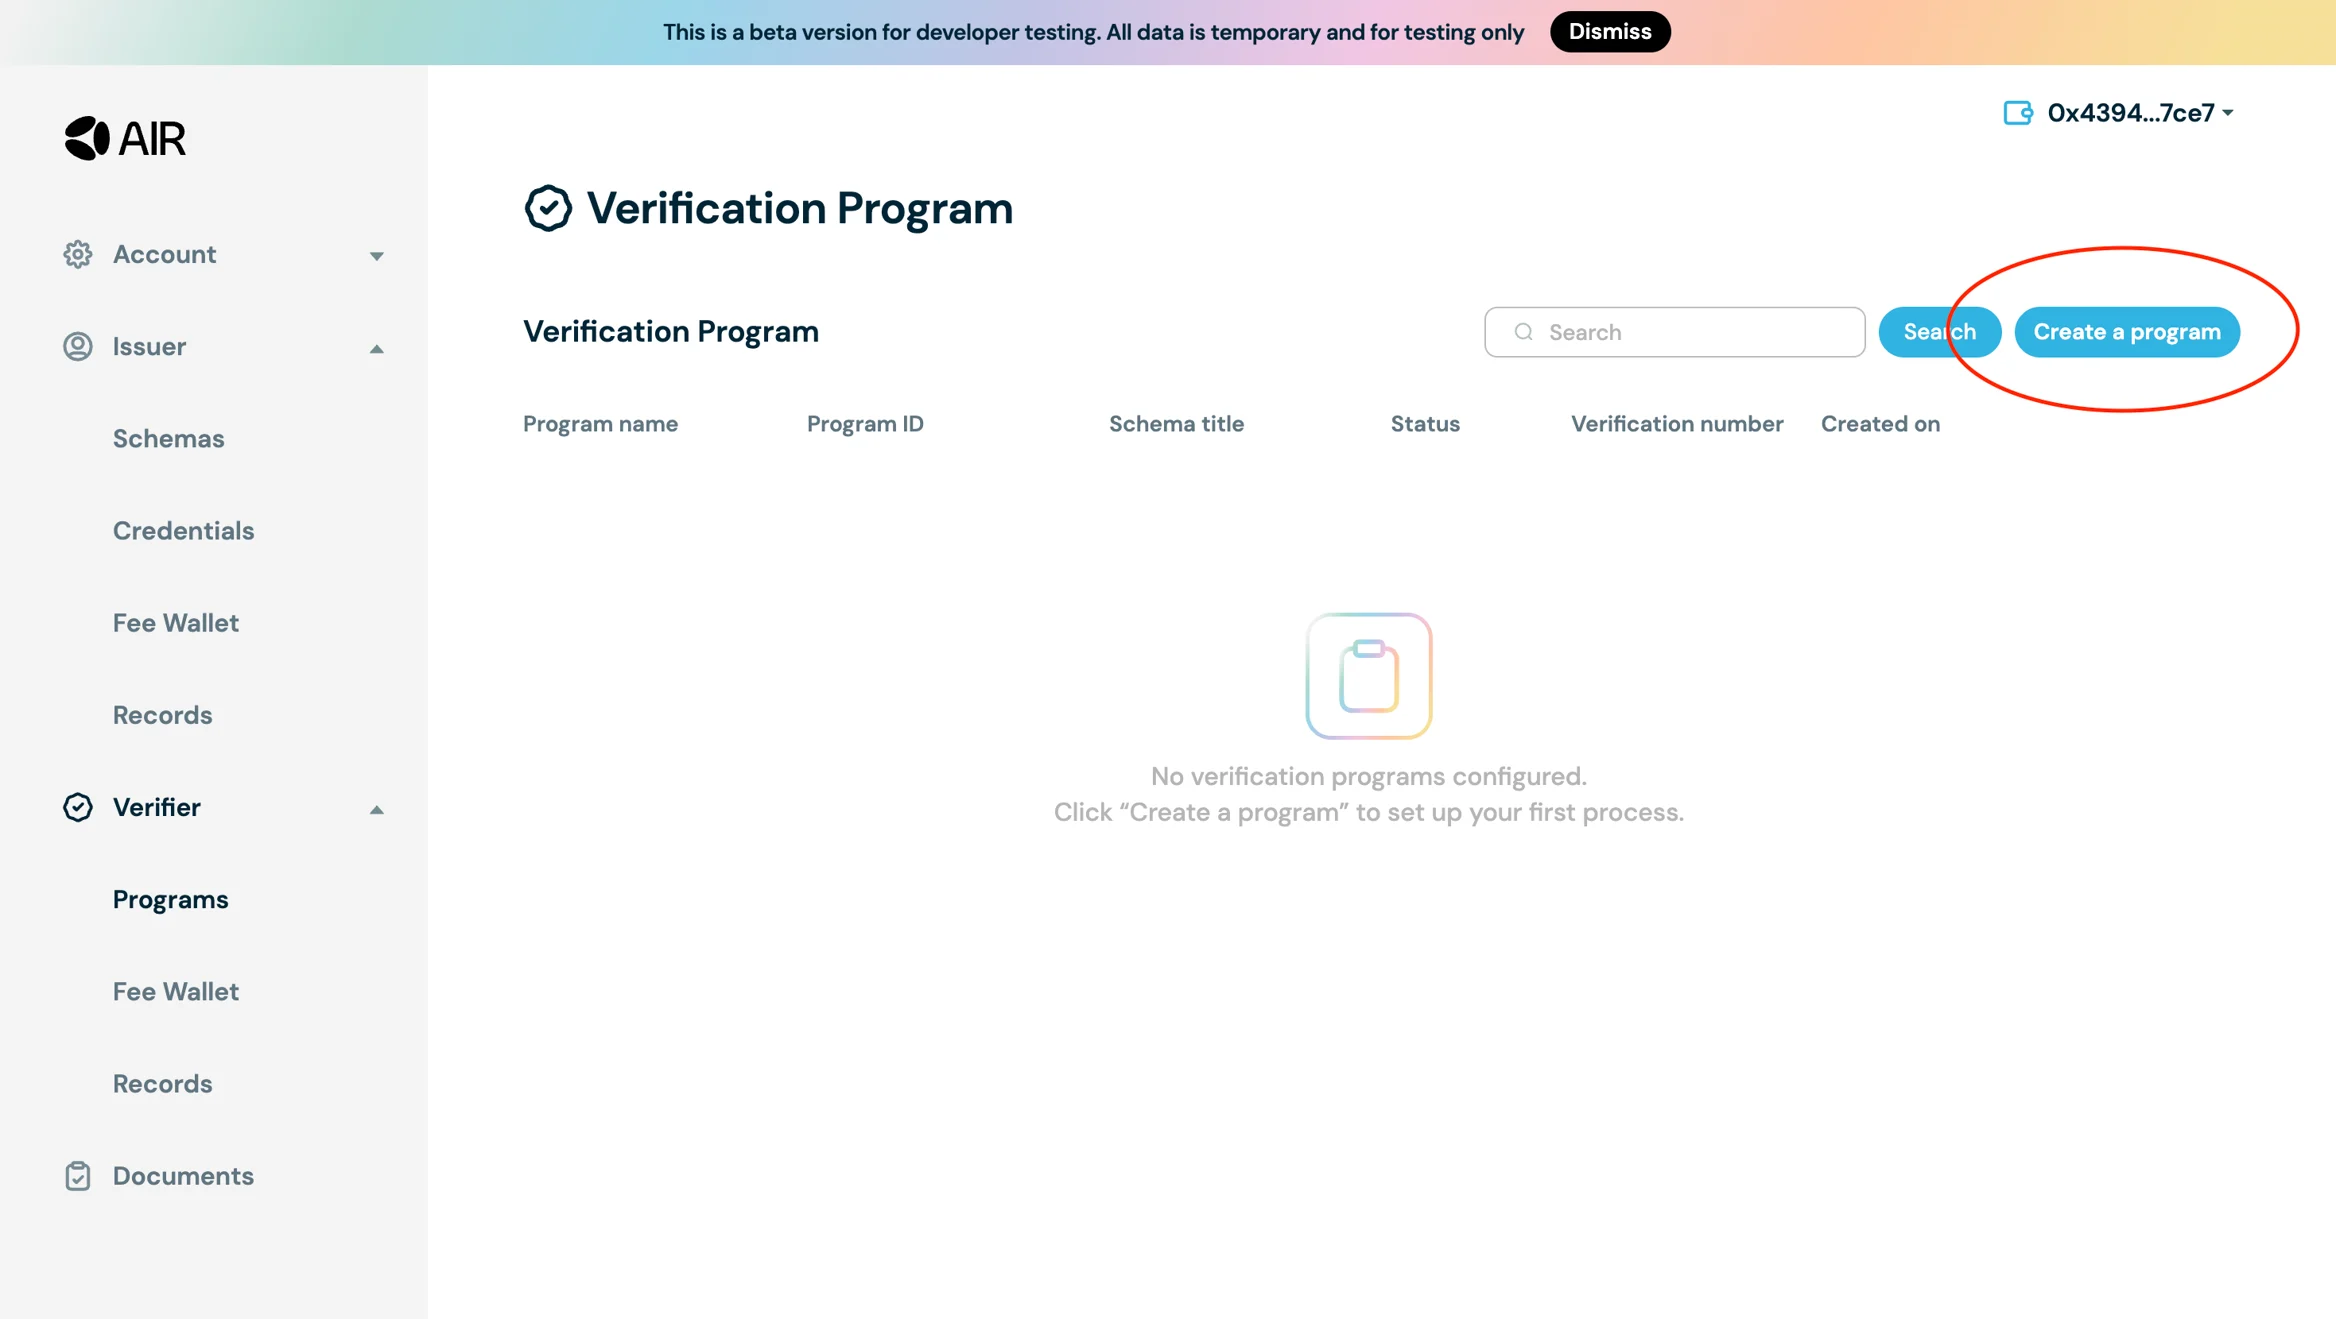
- Select the schema configured for credential issuance (e.g.,
kyc_schema) - Configure your query with question set, operator, and attribute values
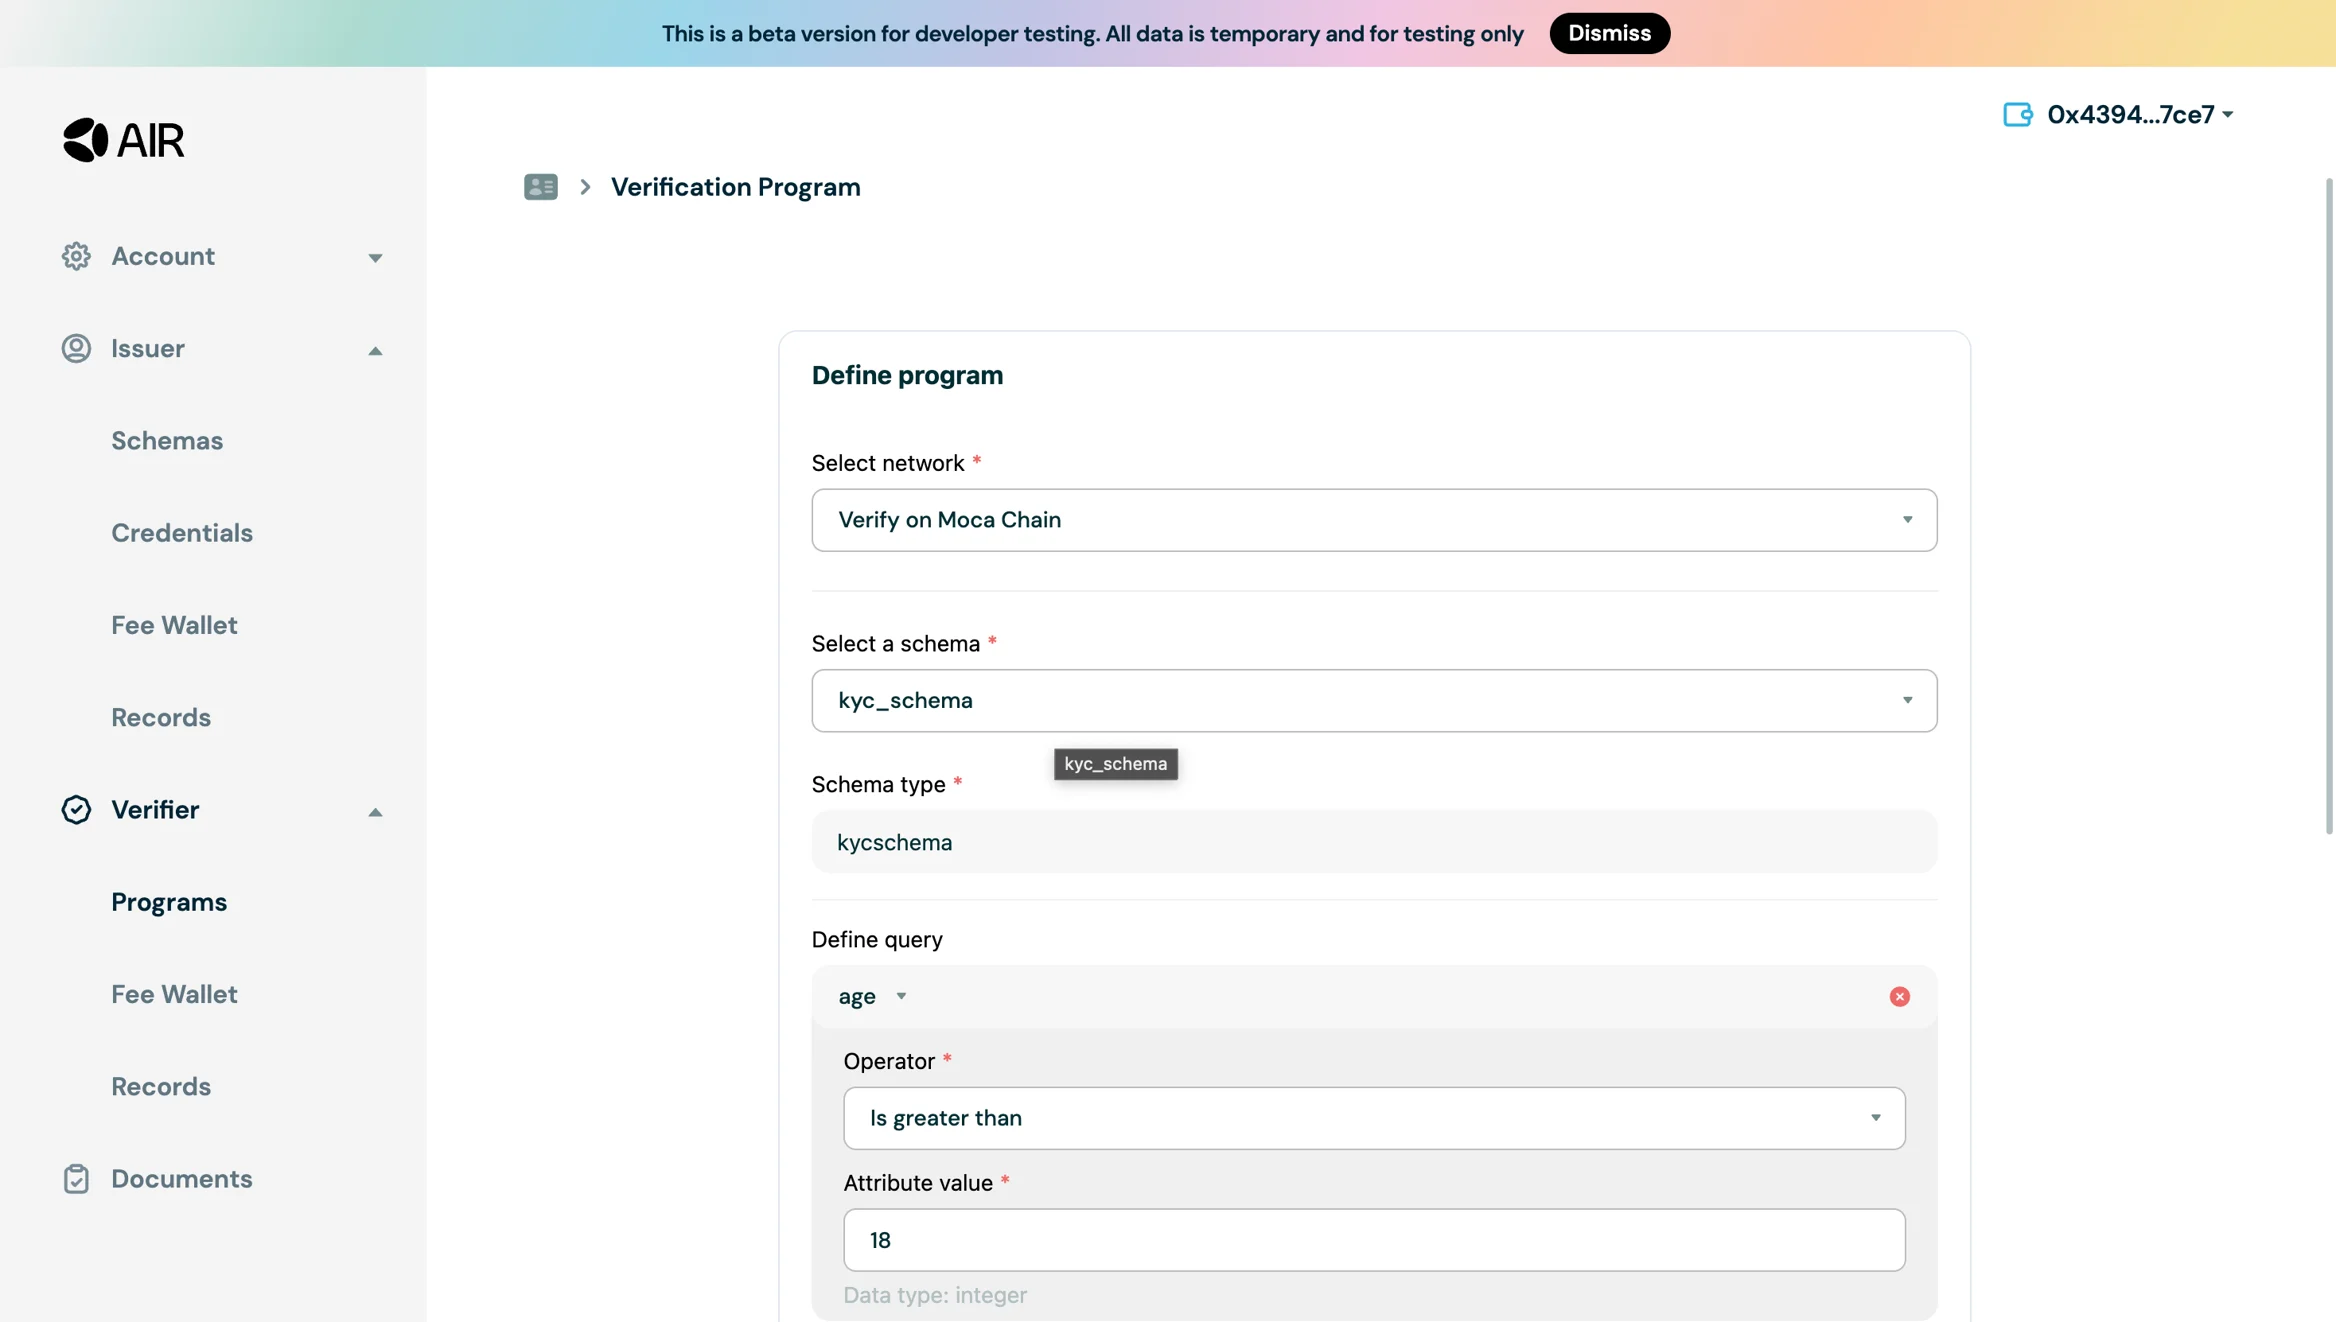
- Add necessary details like Issuer ID and hit save. Your program will be created
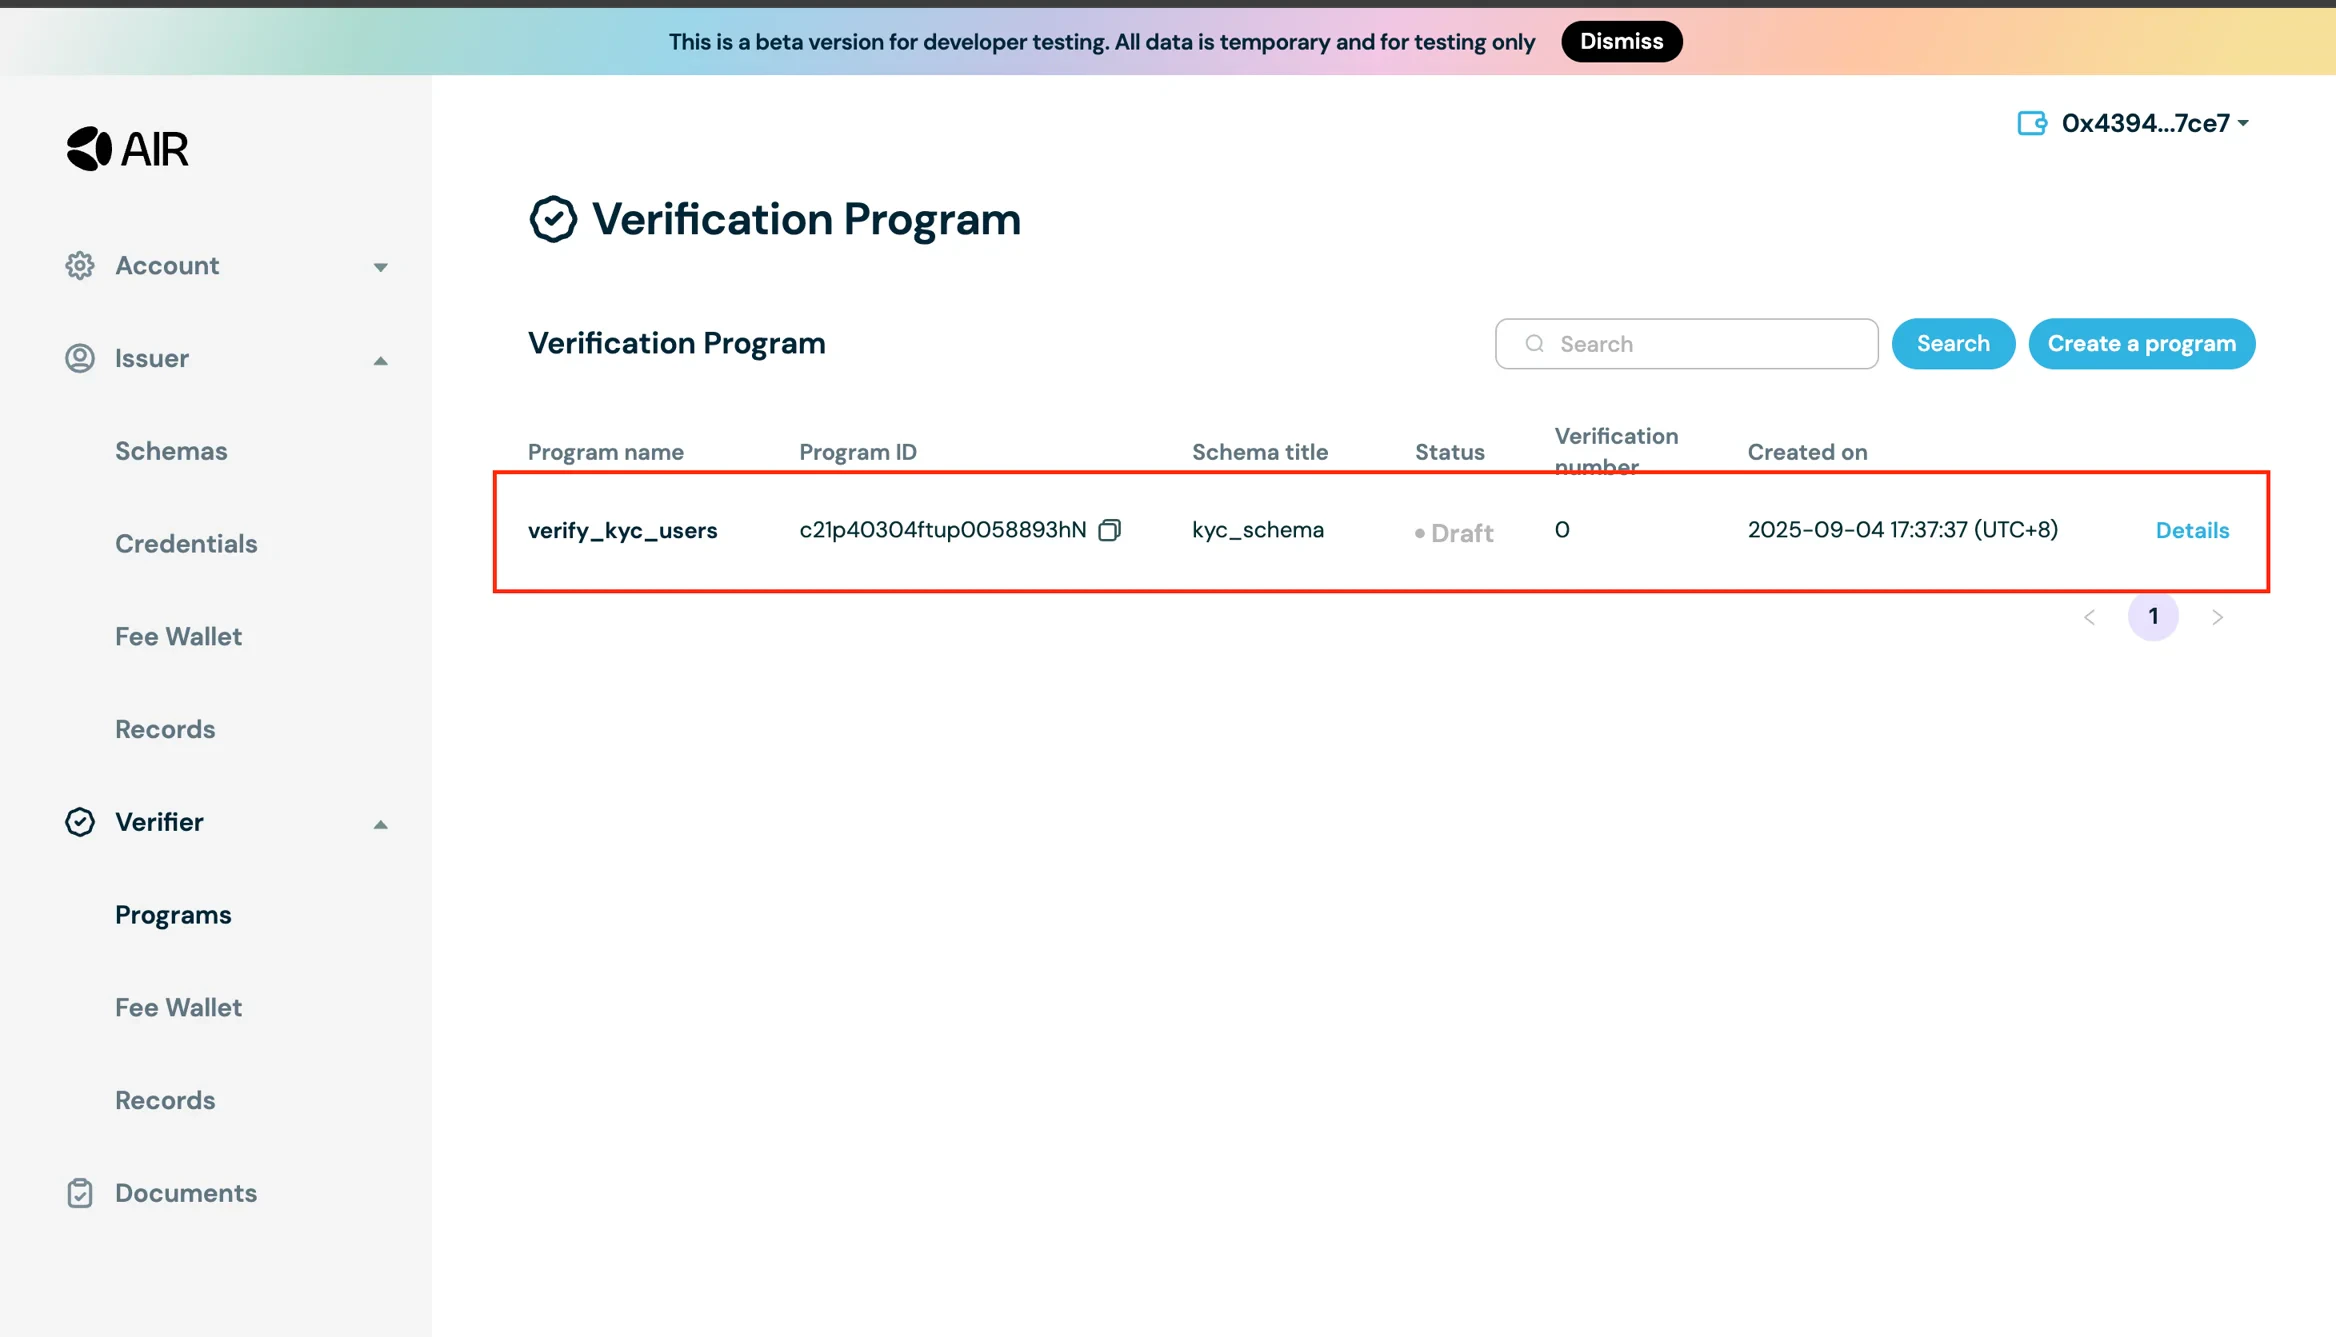
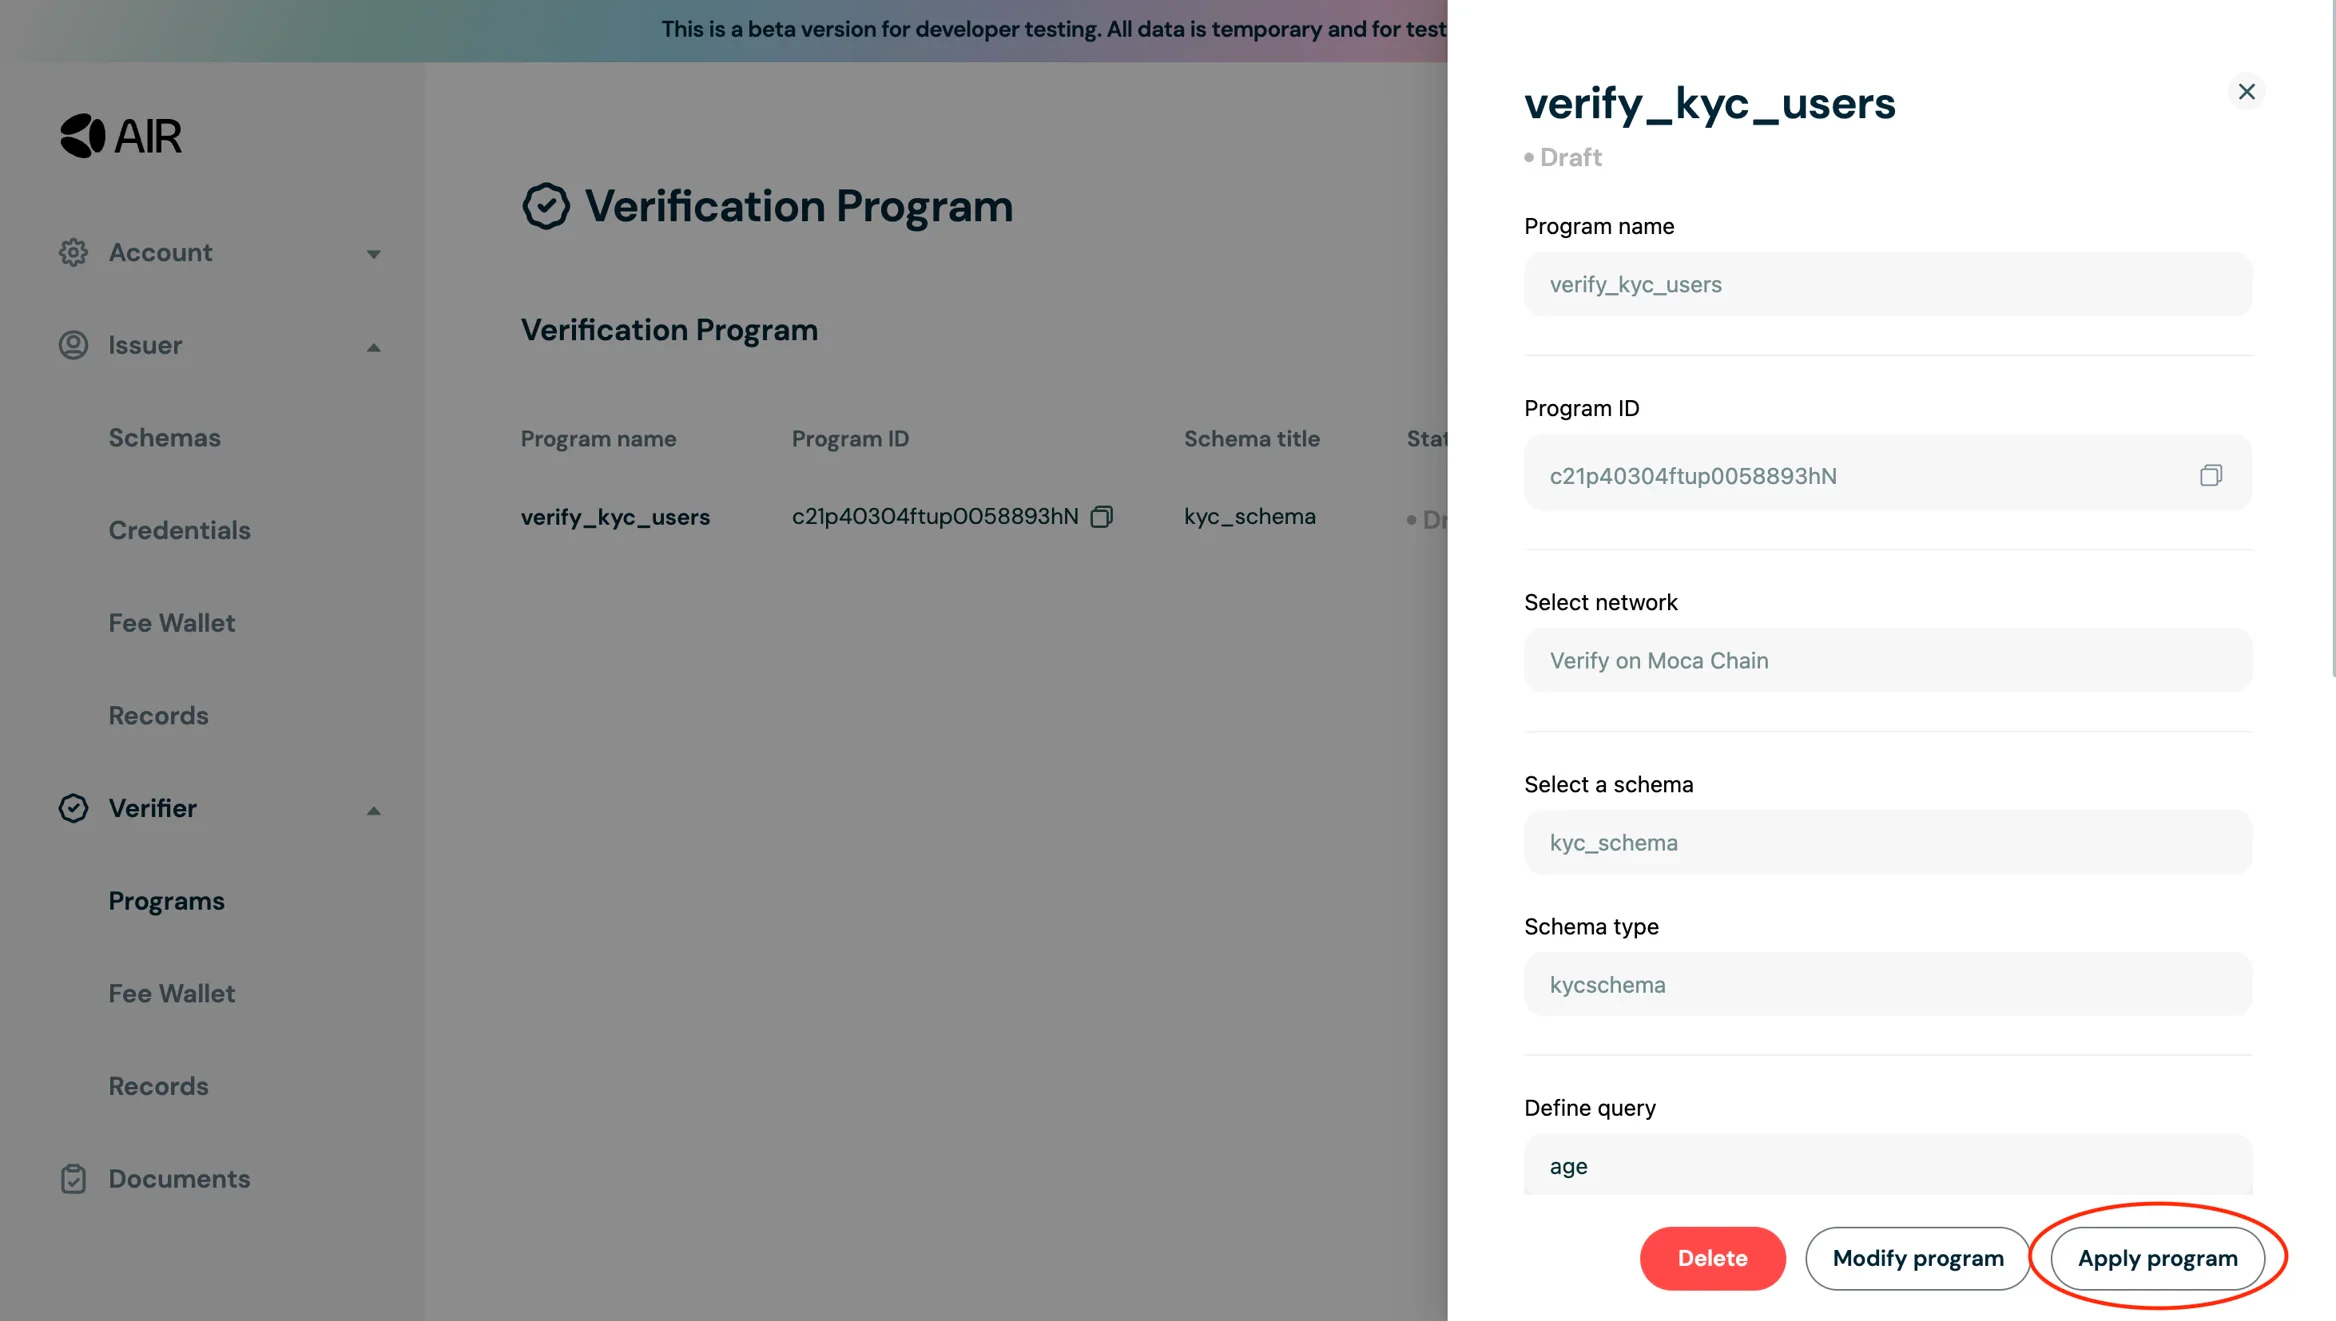
- Now that you have the verifier program created, click on Details and Apply the program.
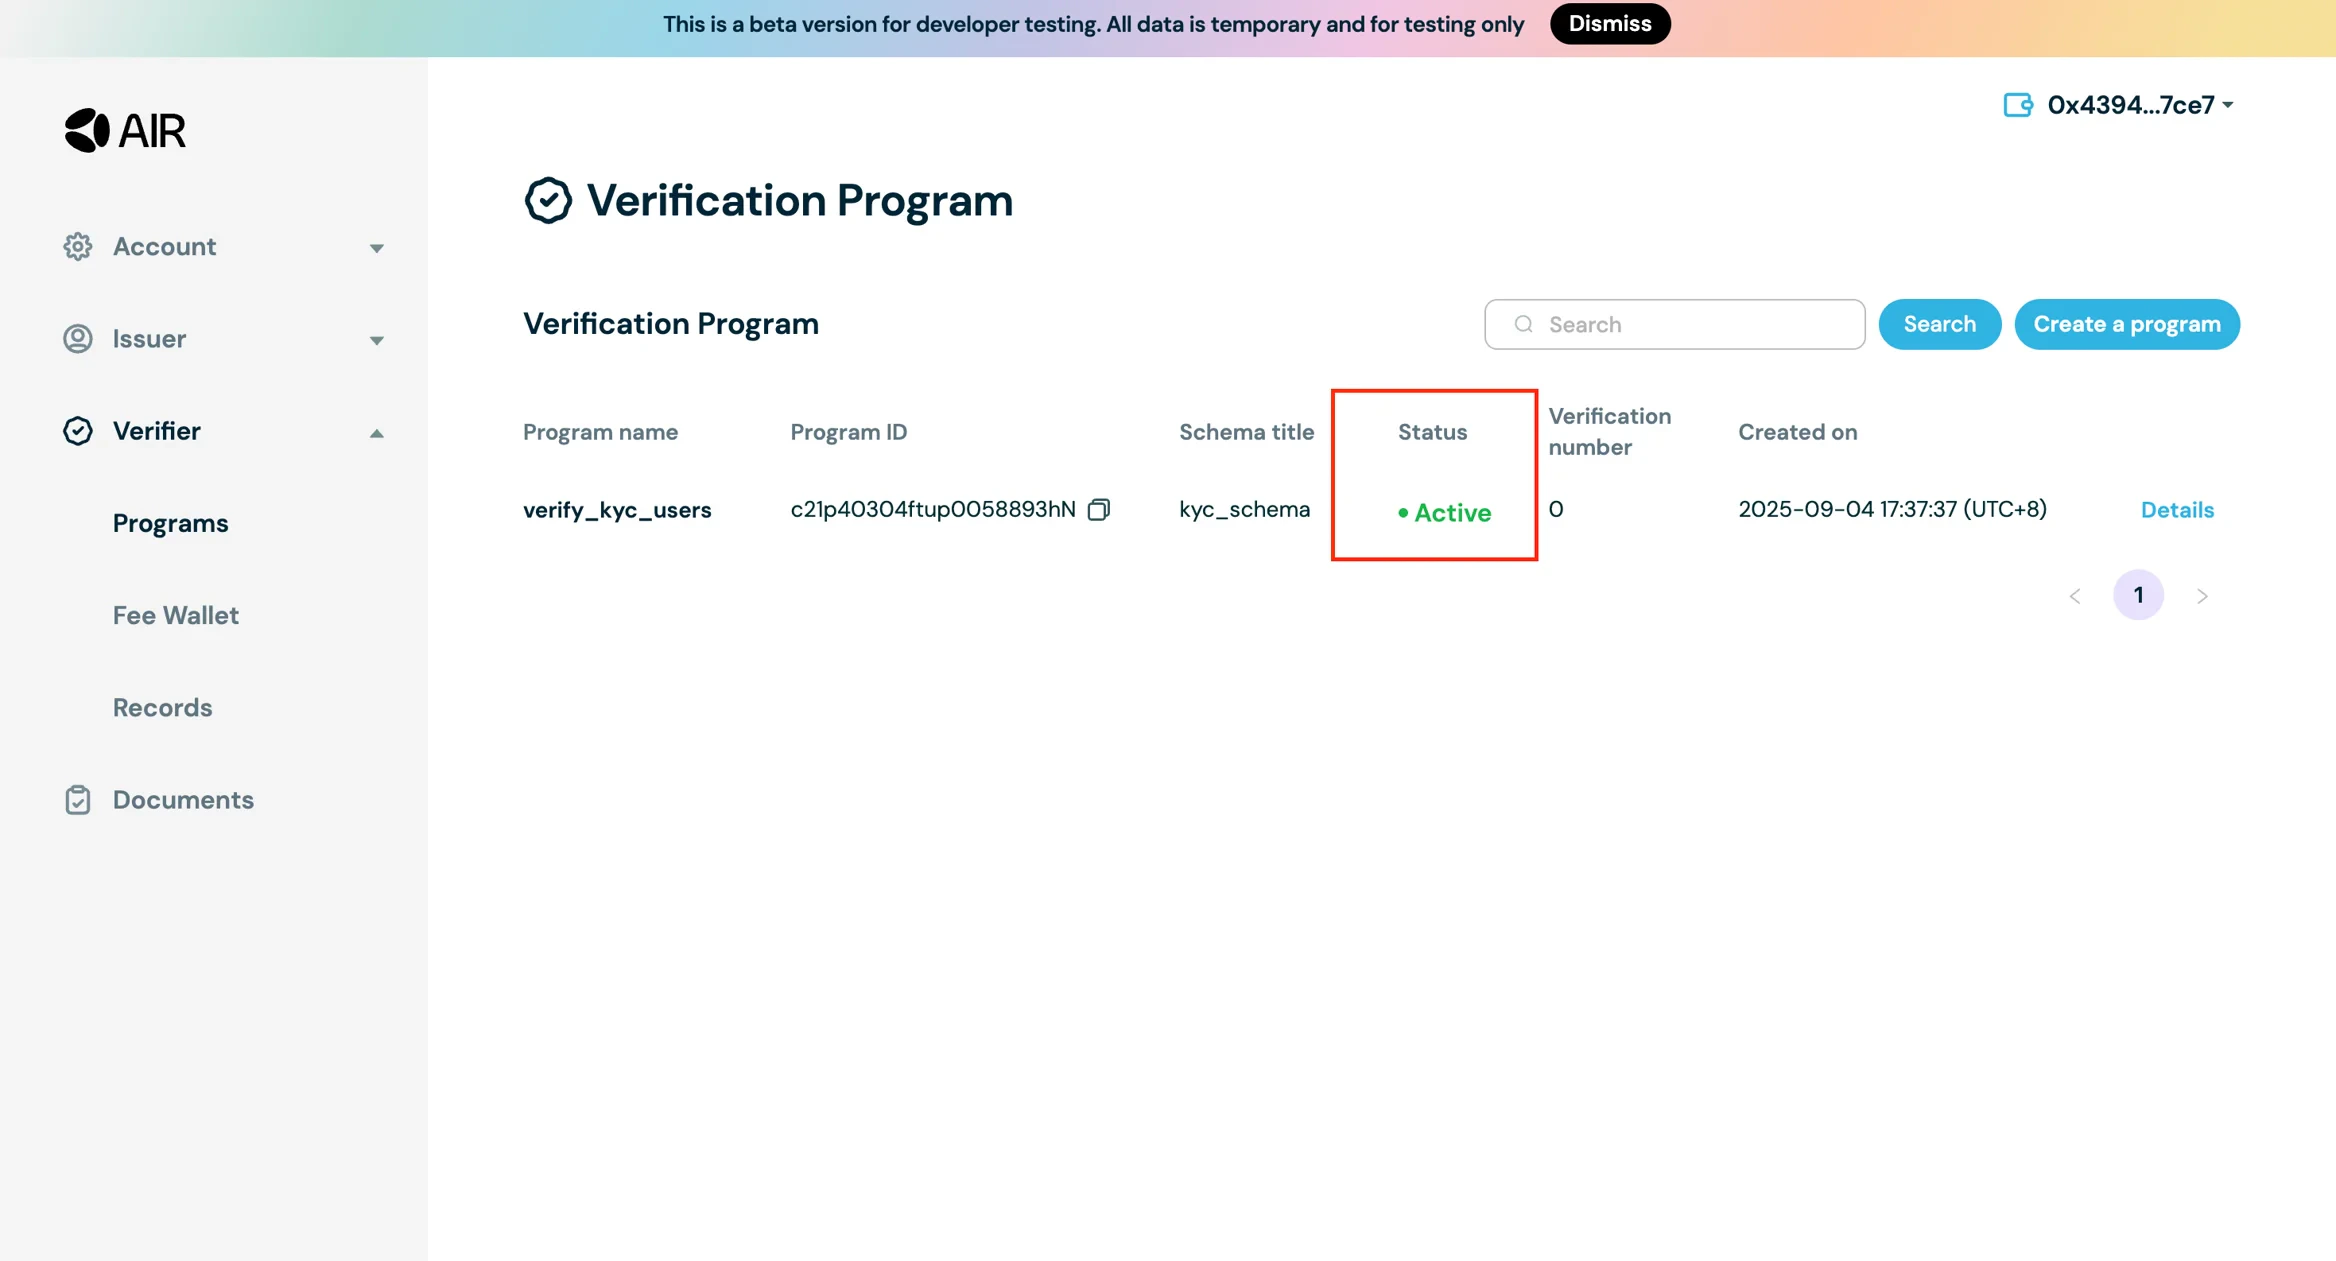
- Once applied the status of the program will change from Draft to Active
Step 7: Verifying Credentials Using the Example App
You can verify credentials using the Example app-
Generate a JWT token on the demo app interface
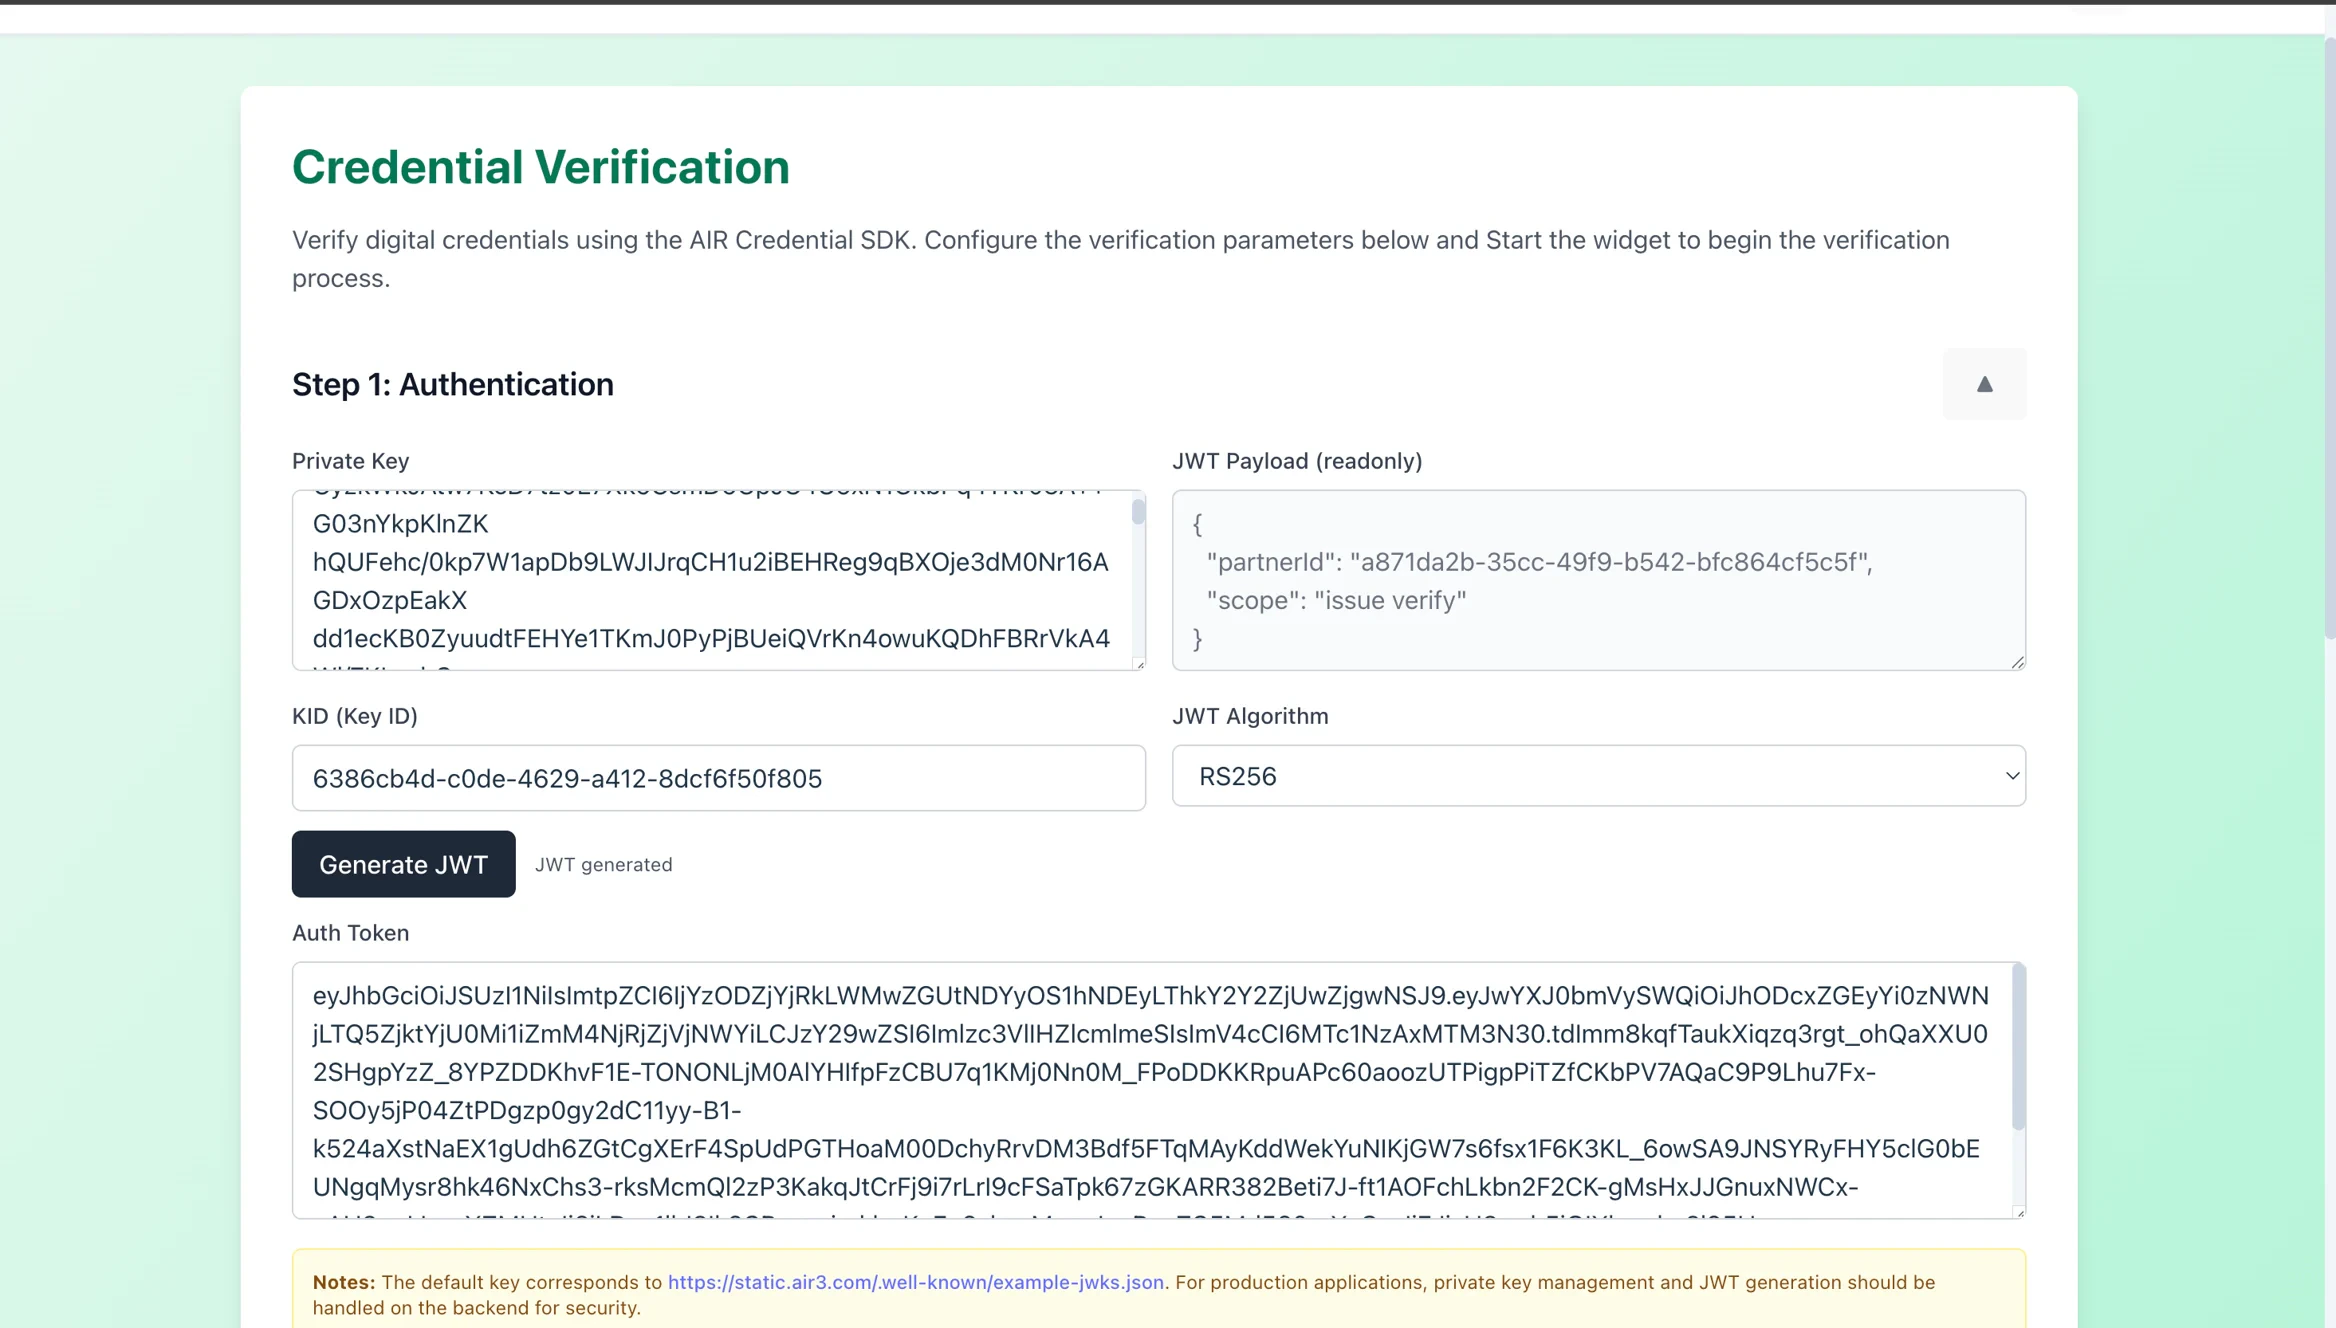
-
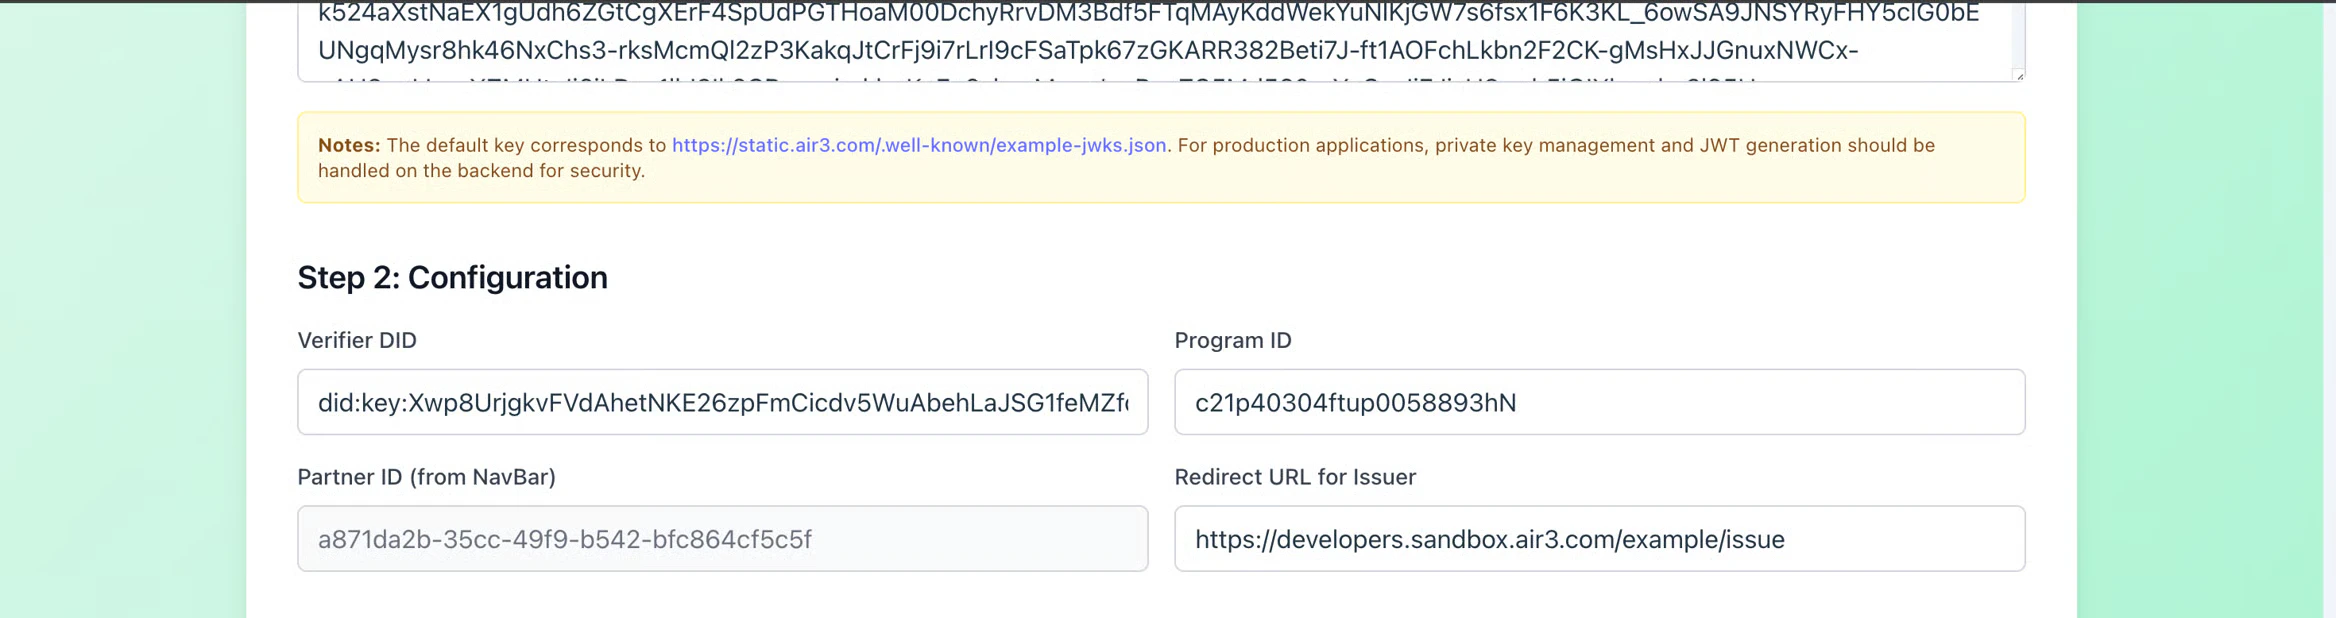
Enter the verifier DID, verifier program ID and a custom redirect URL to issue credential (if required) and click on “Start Credential Verification”
-
The widget will guide you through the verification process.
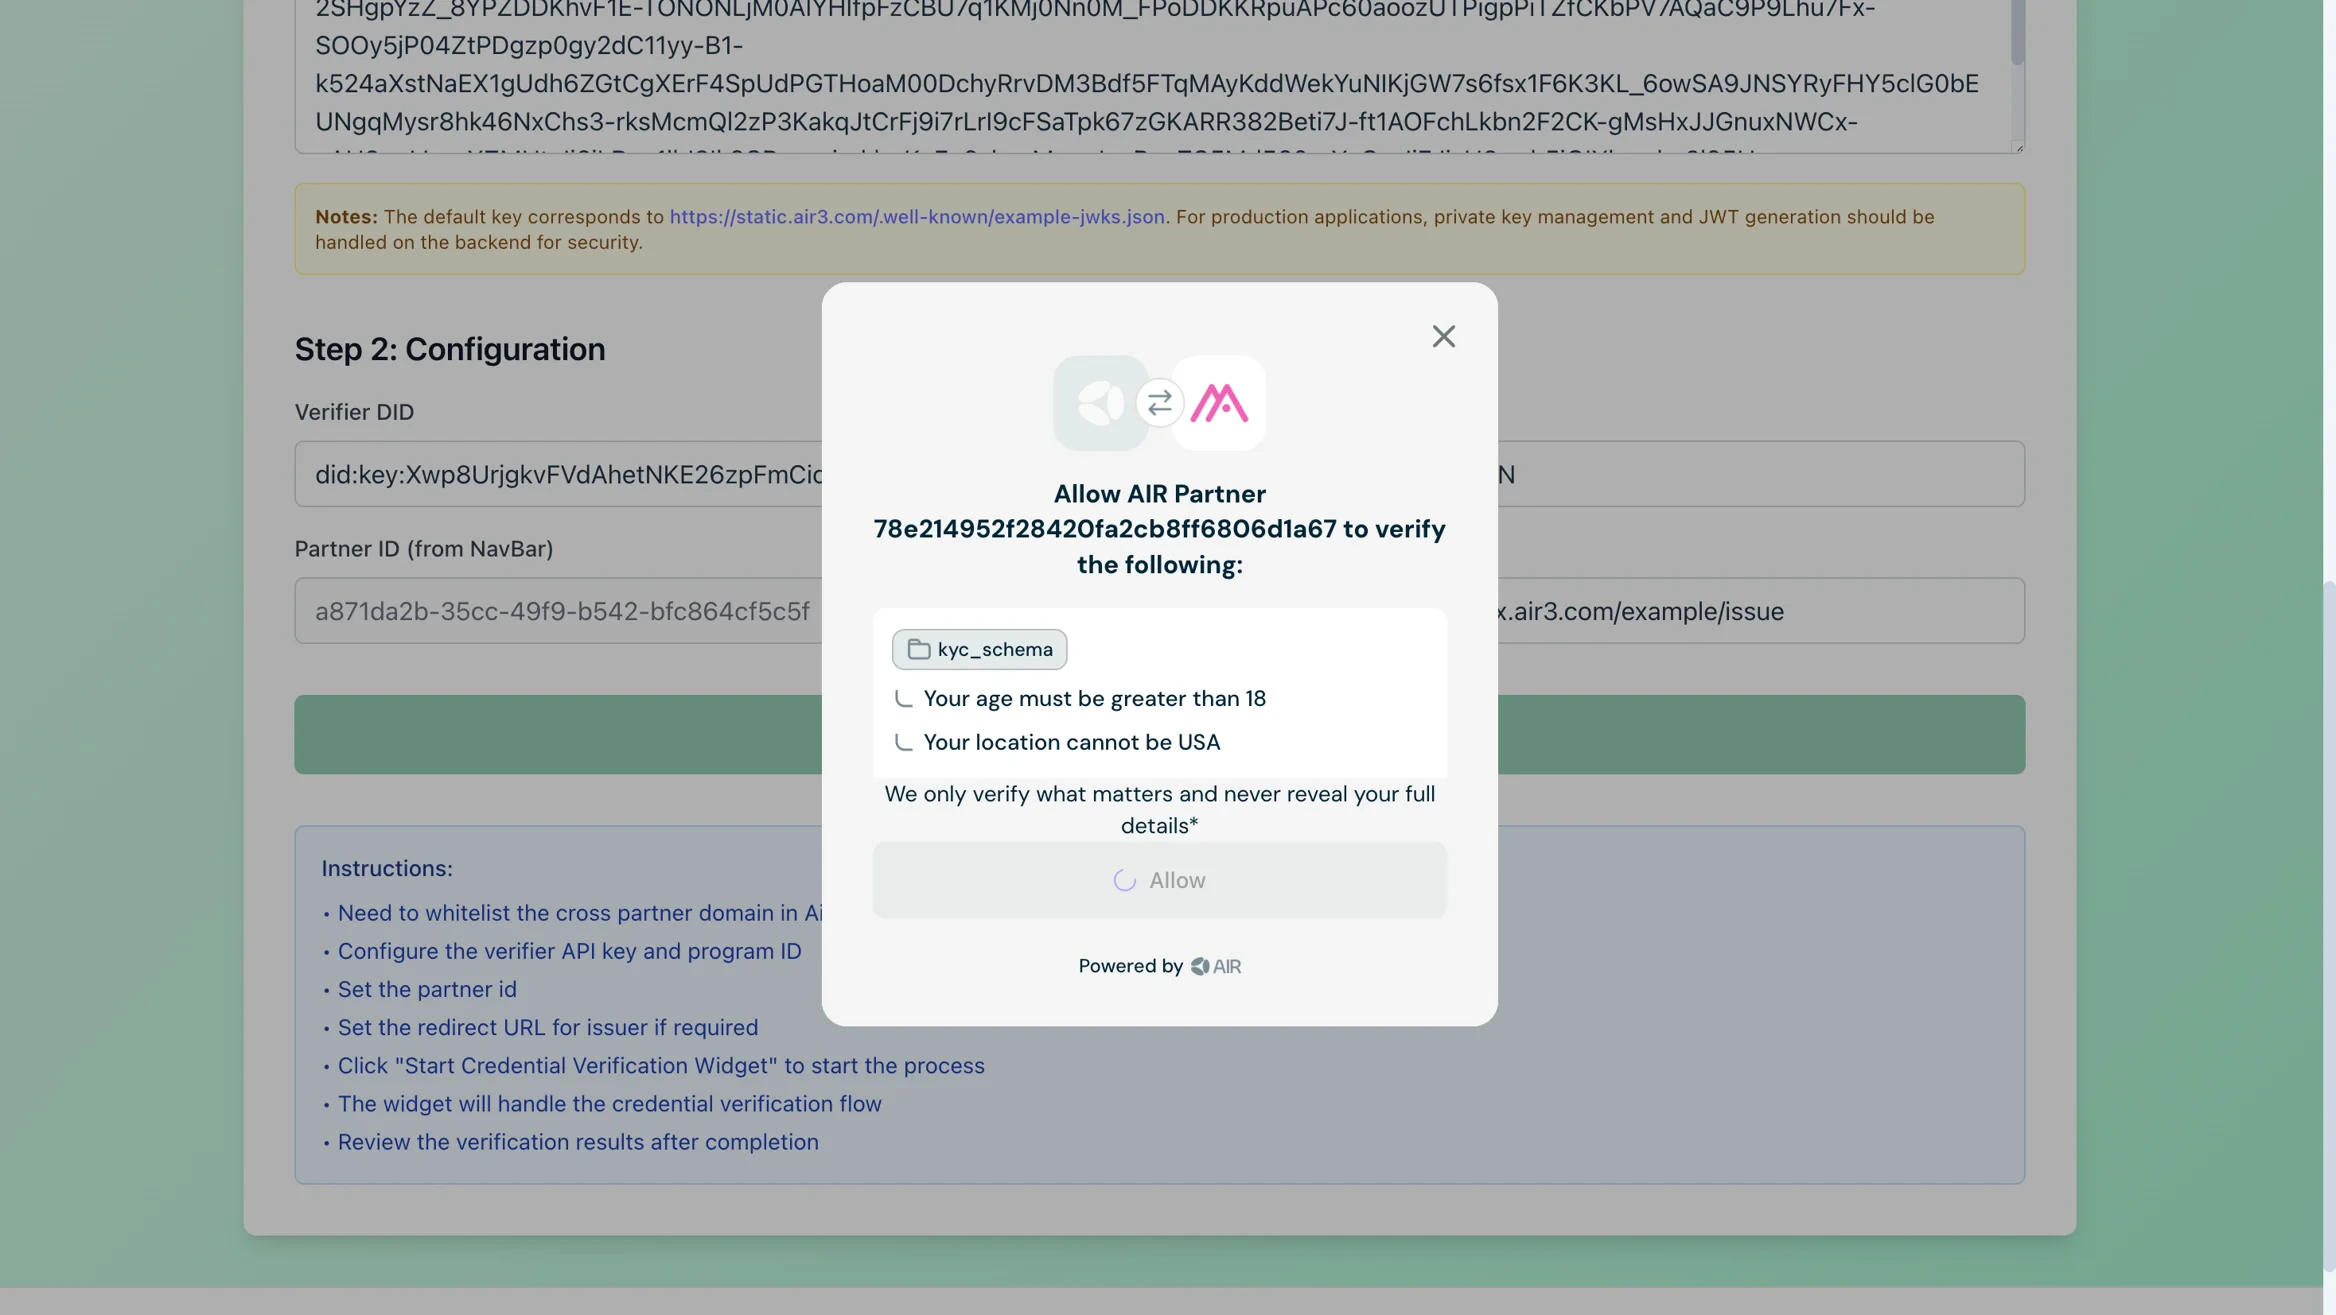
-
Once completed you will be able to verify the result on the UI as compliant or non compliant. In this case the result of verification will be compliant as the age was 20 and location was netherlands [we were verifying adult users outside of the USA].

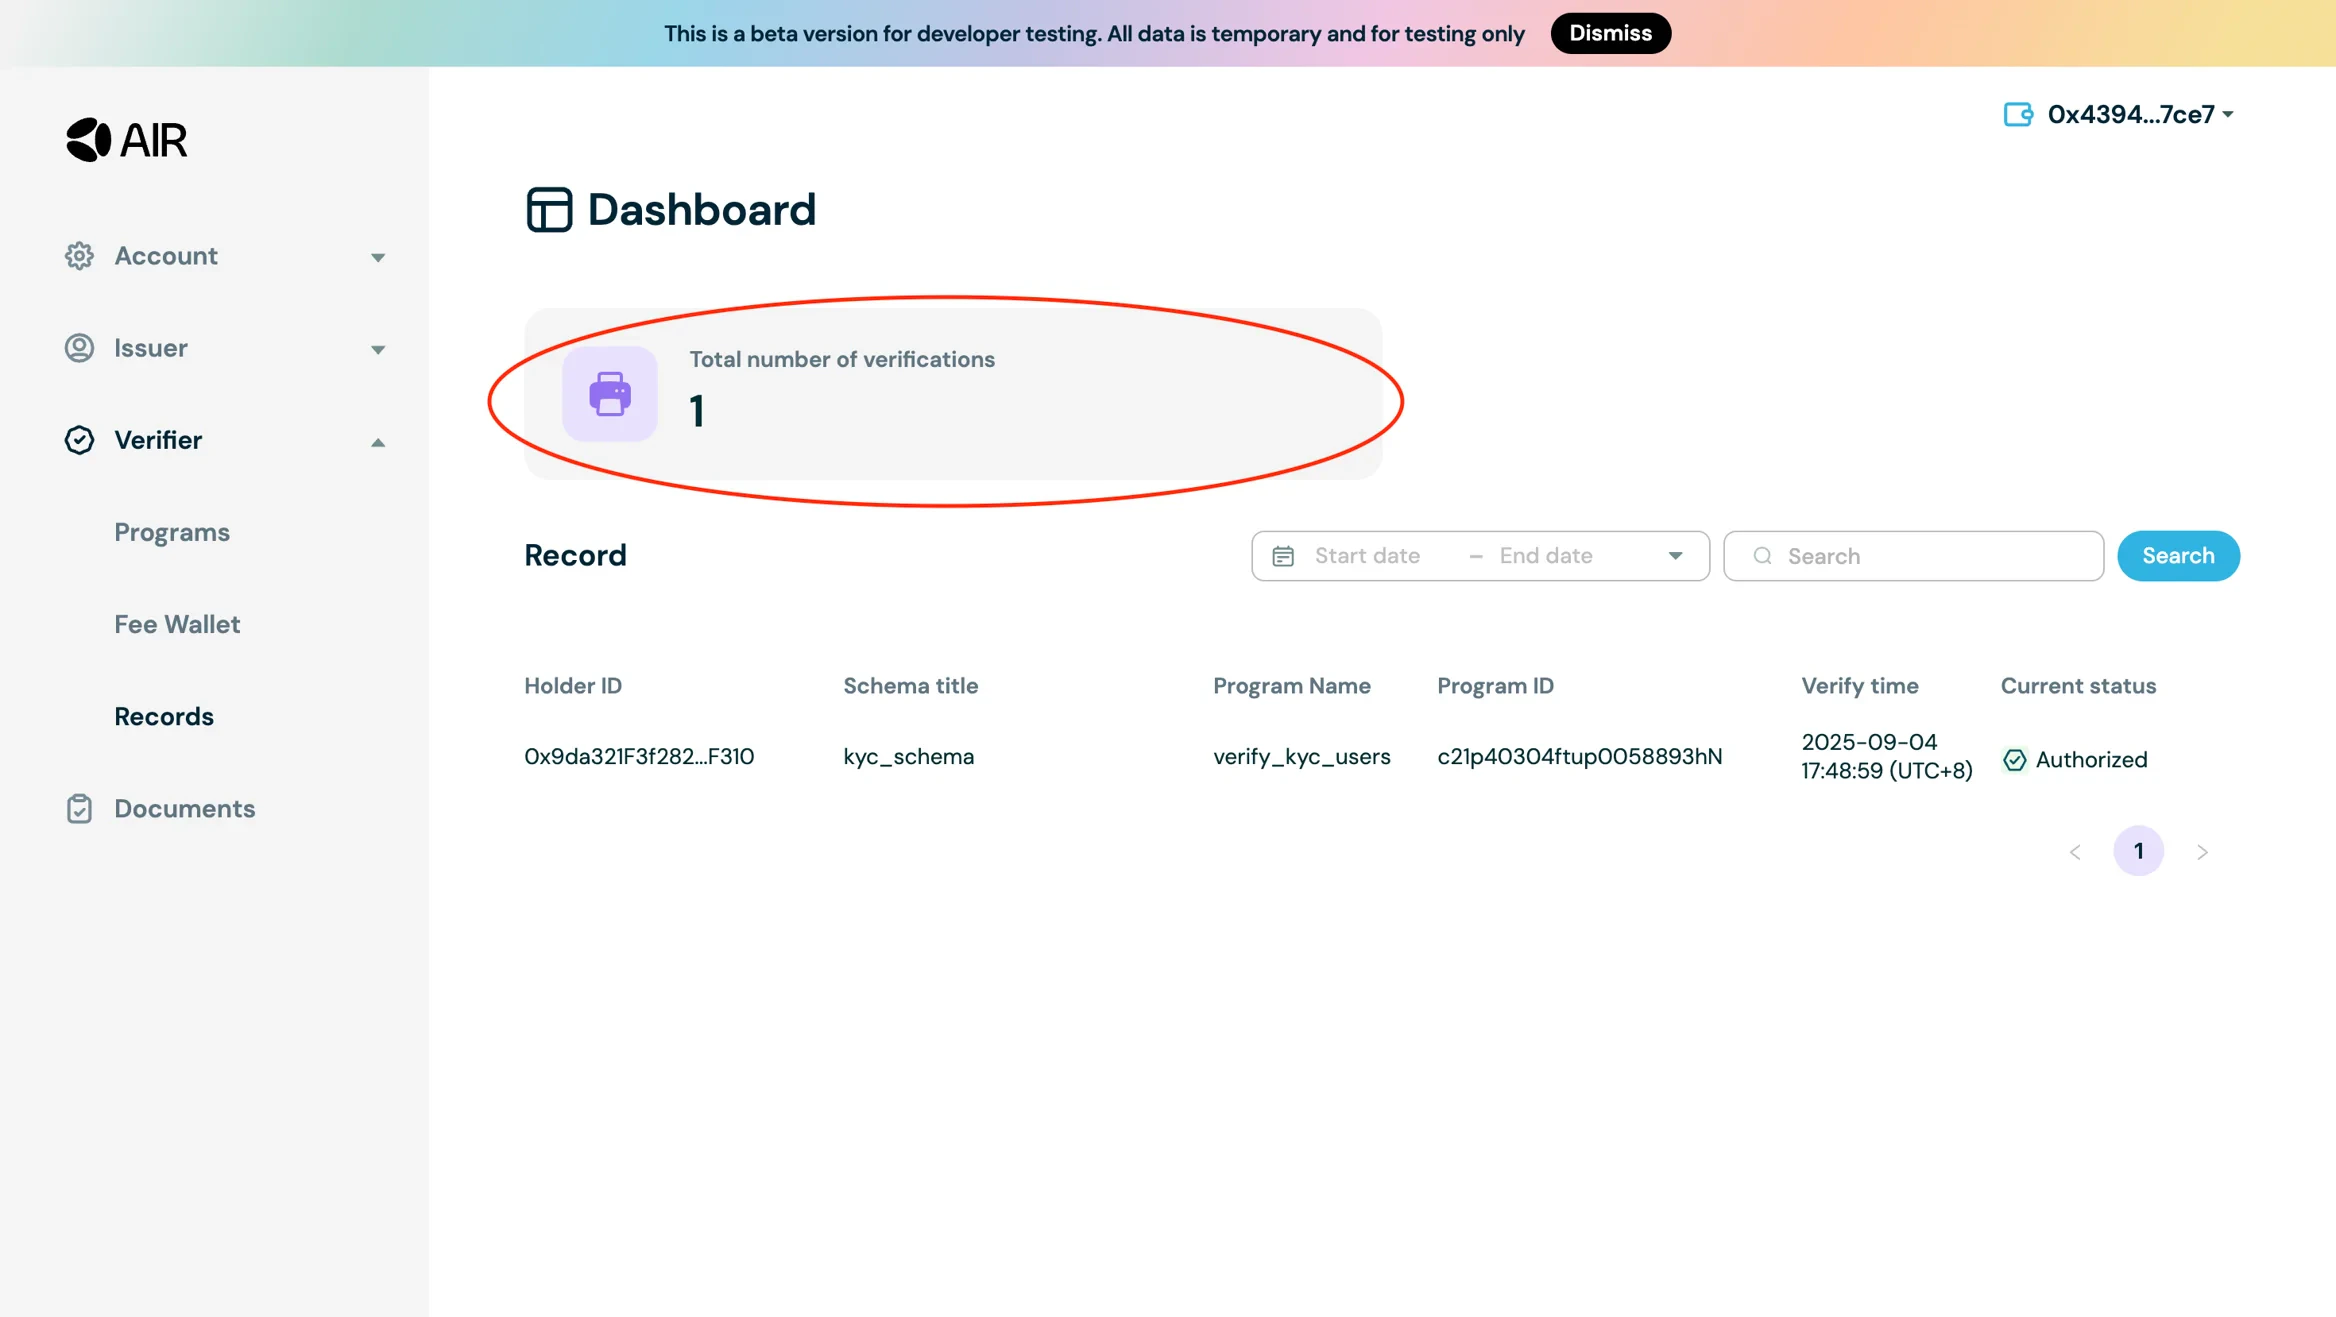
-
You can verify the credential verification under the records section in the Verifier Tab.
Step 8: Verifying Credentials Using the AIR Kit
After you’ve set up your verification program, you can verify credentials programmatically using the AIR Kit. This shows how to configure the verification flow, generate JWTs for authentication, and interact with the AIR SDK’s verification API.Configure Verification Parameters
We need the following key parameters and configs:verifierDid: The DID (Decentralized Identifier) of the verifier - identifies who is performing the verification.programId: The credential program being verified against. This must match the program ID on the Developer Dashboard.redirectUrlForIssuer: Used in cases when the credential doesnt exist and you want to redirect your user to claim a credential / issue one for them.
Authentication (JWT Handling)
partnerIdandprivateKeycome from environment variables.- JWT is used for authorization when calling airService.verifyCredential function.
you can refer to Authentication (Partner JWT) on how to generate JWT tokens
Tip: For production, generate JWTs on the backend to keep private keys secure.
- Private Key: Needed to sign JWTs, proving the verifier’s identity.
- Generated JWT: The signed token that authenticates API calls to AIR Service.
Verify the Credential
CallairService.verifyCredential to verify the credential:
- Verifier must have a properly initialized
airServiceand a logged in user. - Call
airService.verifyCredentialwith: - authToken: the JWT generated above. - programId: ties verification to the specific credential program configured on the Developer Dashboard. - redirectUrl: ensures redirect-based verification flows can complete.- Store Results: verificationResult is updated with the outcome (status + payload).
- When
statusis"Compliant"and compliance encryption is enabled,cakPrivateKeyis available for decrypting compliance data. See the Verifying Credentials documentation for details.
Status Handling
Helper functions map the verification status into colors, icons, and descriptions:Summary of Verification Process
- Set up verification program on the Developer Dashboard
- Configure verifier DID, program ID, and redirect URL
- Generate JWT for authentication
- Call
airService.verifyCredentialto verify the credential - Handle verification results and display status
Example Implementation
For a complete working example, check out the AIR Credential Example repository which demonstrates:- Full credential verification flow with React components
- Verification status handling and display
- Error handling and user feedback
- Complete integration with the AIR Kit’s Credential Services
Next Steps
Now that you know how to verify credentials, you can:- Issue credentials - Learn how to use plug and play templates for issuing and verifying credentials in the Plug and Play Quickstart