- Setting up the AIR Kit
- Defining and issuing credentials to users
- Managing credential issuance flows
Backend API AlternativeThis guide covers client-side credential issuance using the AIR Kit SDK. For server-side credential issuance without user interaction, see Issue Credentials on Behalf.
What You’ll Build
By the end of this Quickstart, you will have:- A credential schema defined for your app (e.g., membership, role, event pass)
- Code that issues credentials to users after login
- Application logic that handles credential issuance results
Before Starting, Ensure You Have
- Completed or understood the Login & Sessions Quickstart (recommended but not mandatory)
- Node.js v18+ installed
- A public HTTPS JWKS URL registered in the Developer Dashboard —
issueCredentialcalls fail without it. See JWKS endpoint setup.
Step 1: Install the AIR Kit
Step 2: Get Your Partner ID
- Go to the Developer Dashboard and login with your EOA wallet
- Connect your wallet
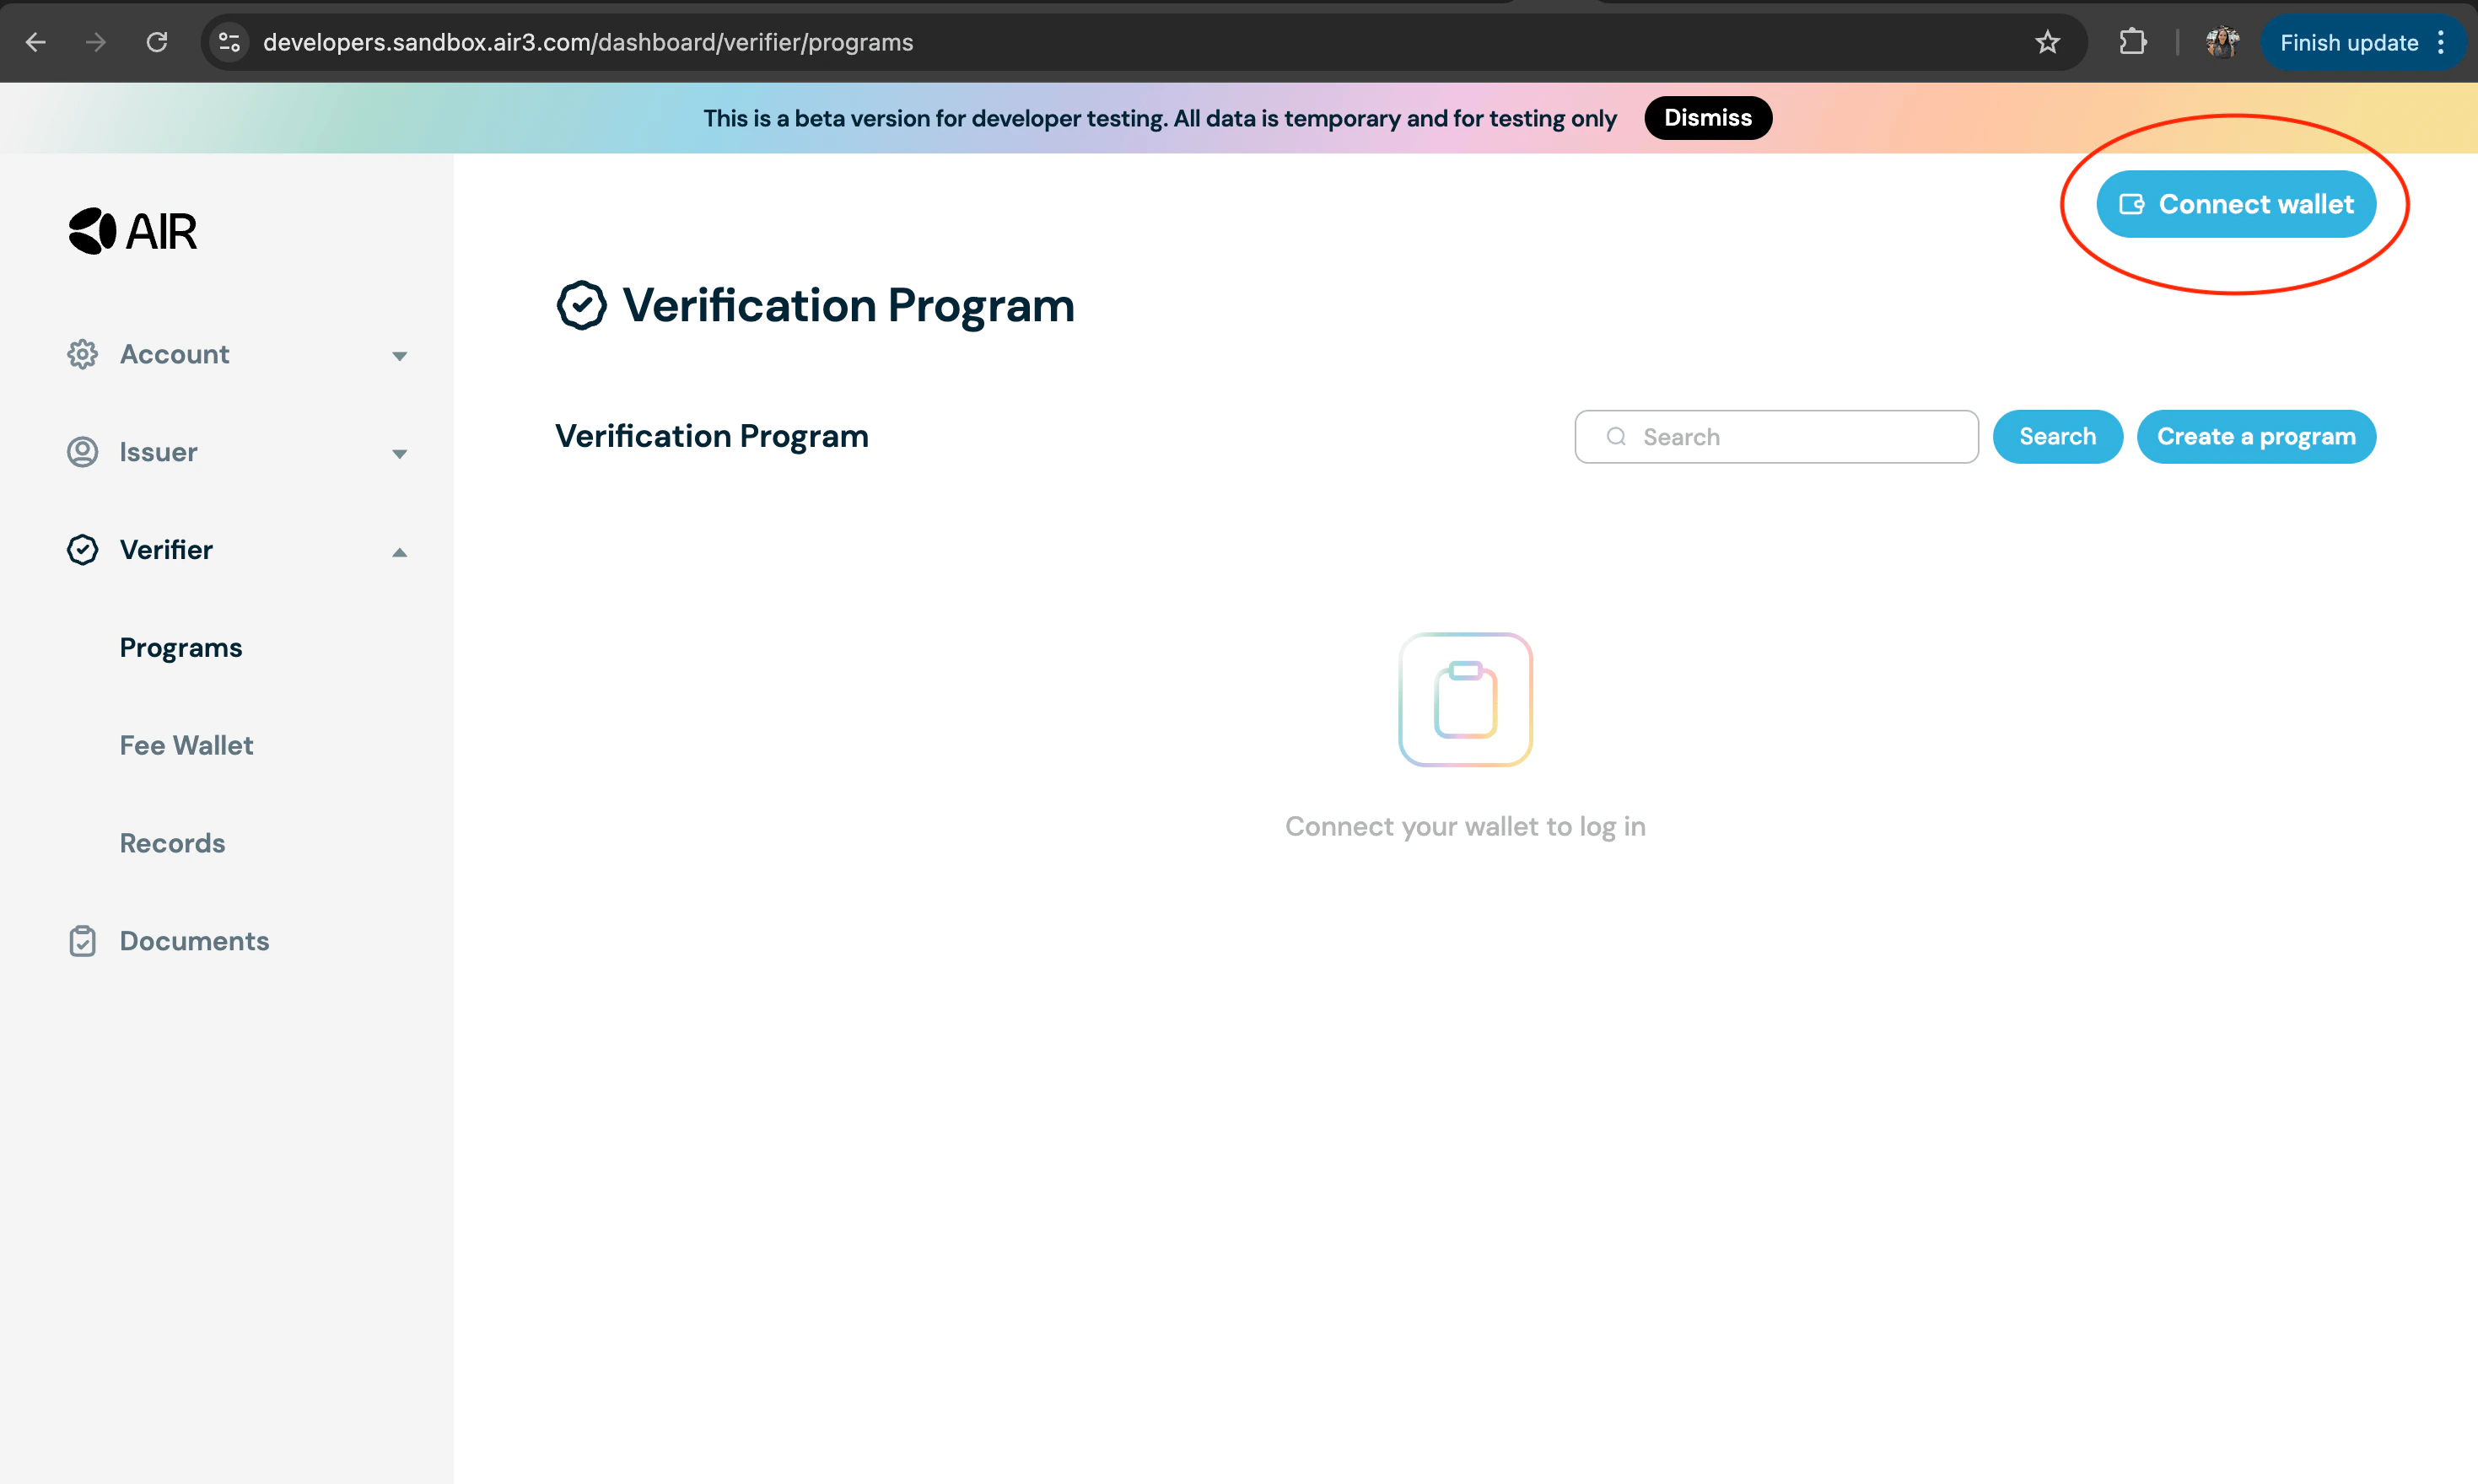
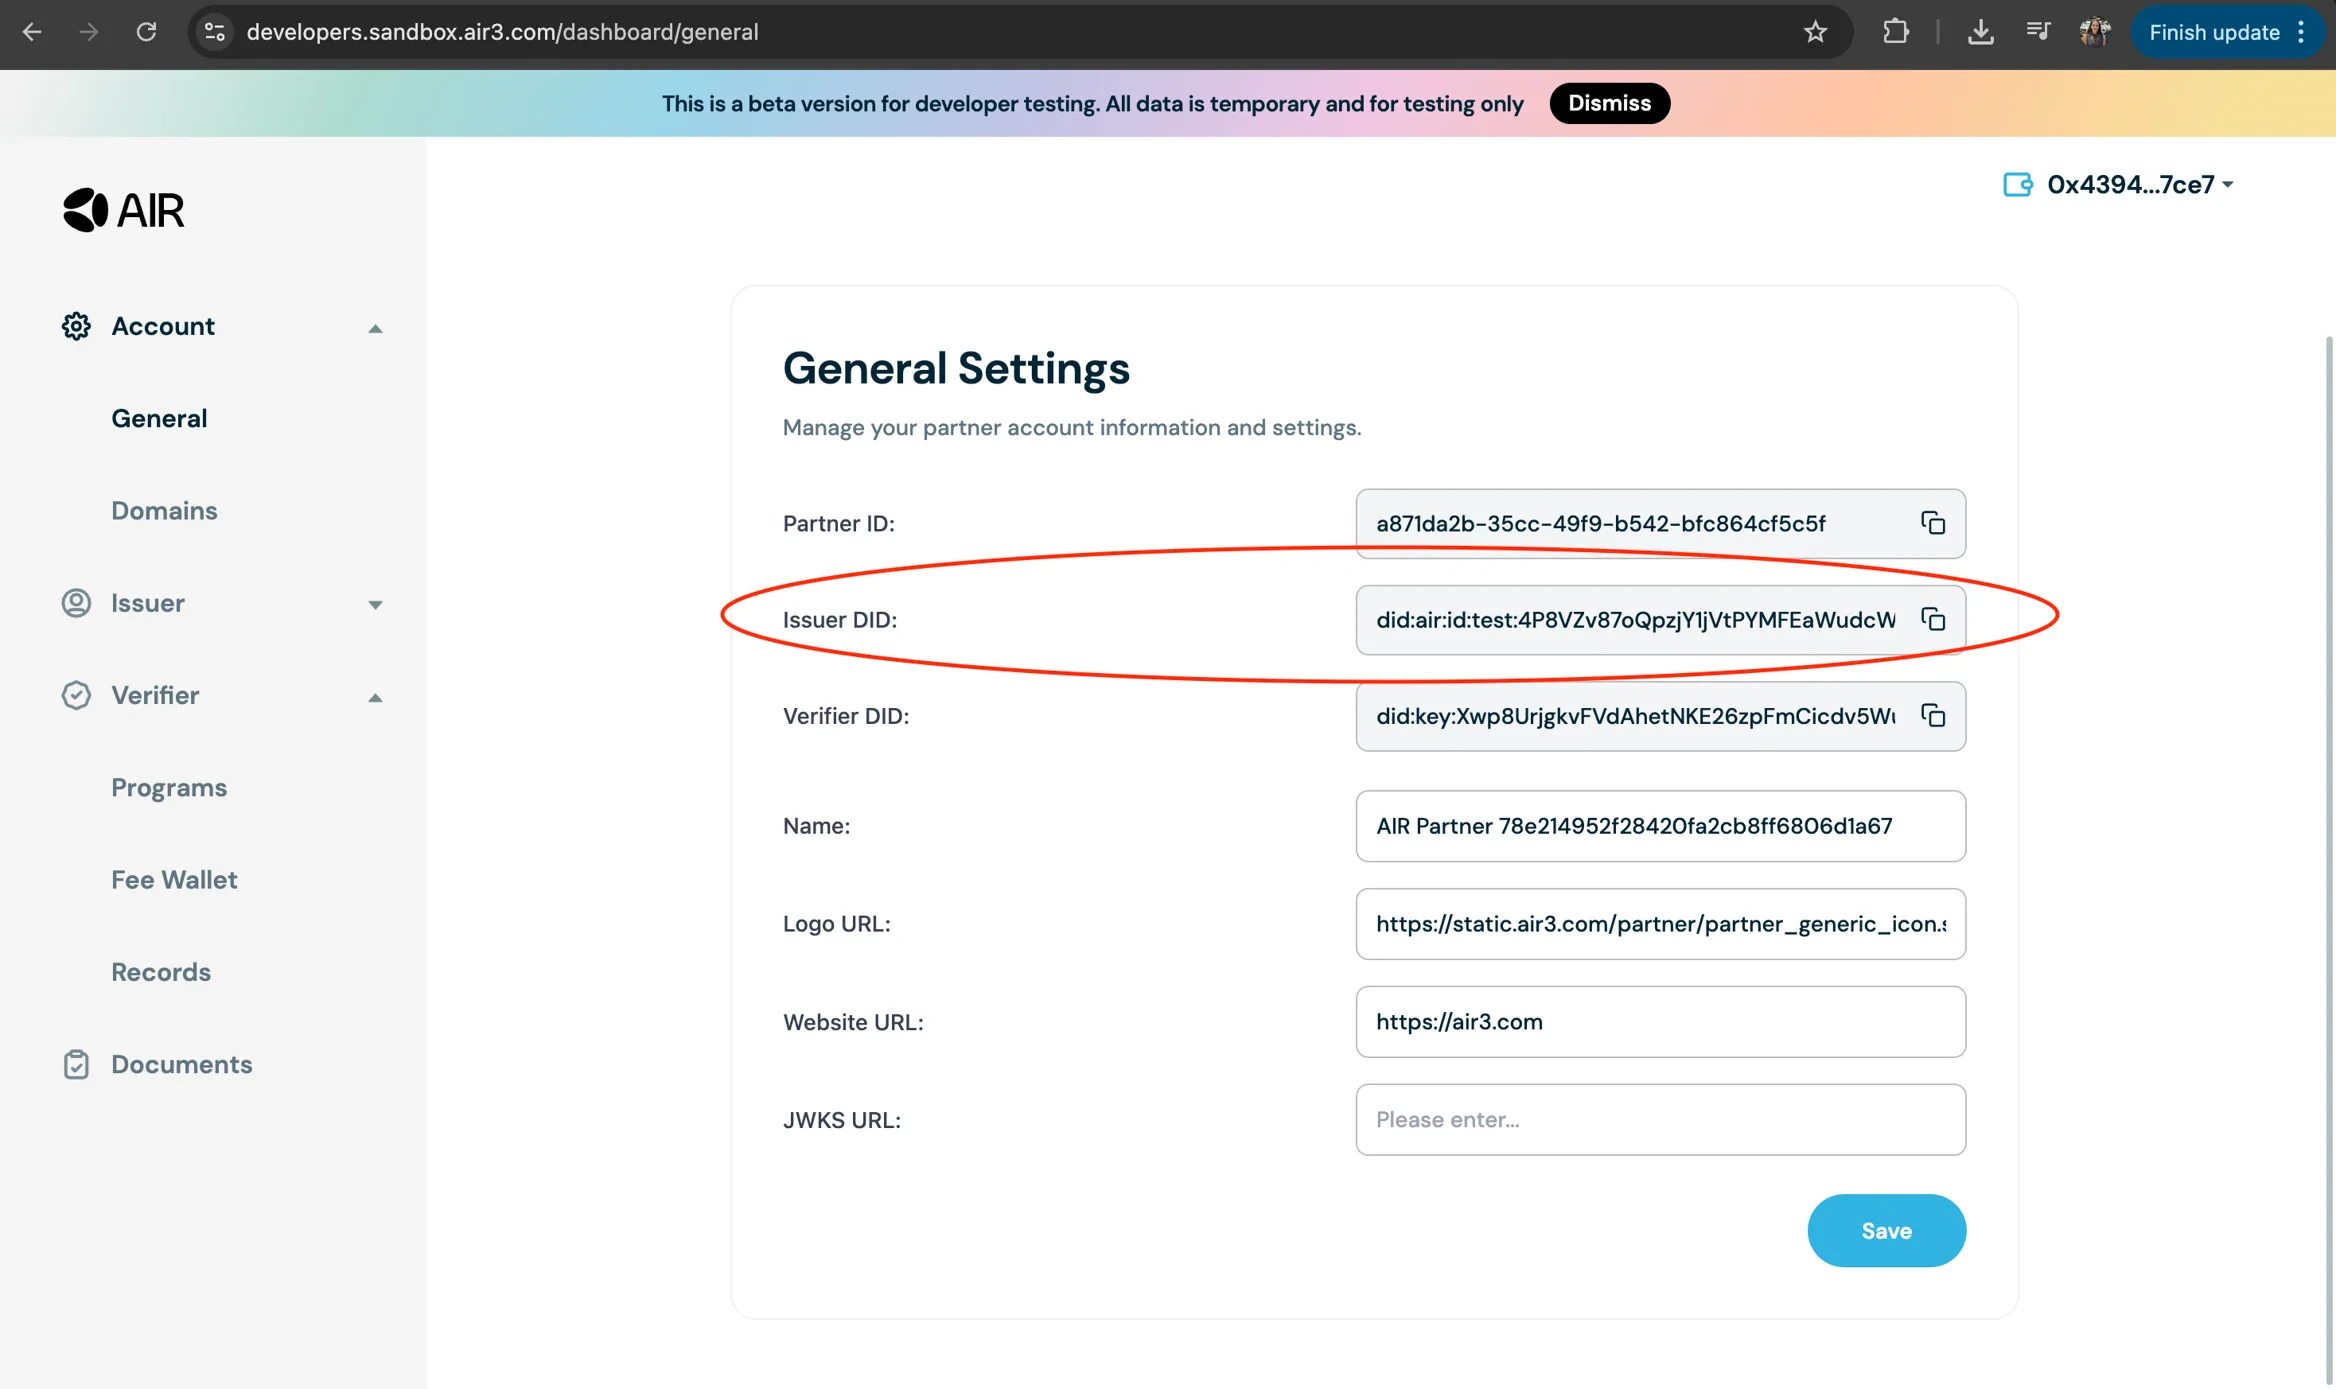
- Navigate to the Accounts section on the navigation bar on the left. Then go to the General section. Copy the Partner ID and Issuer DID from the partner account information and settings

Step 3: JWKS endpoint + Partner JWT (required — blocks issue/verify)
issueCredential cannot succeed until your Partner JWT is signed with a key that AIR can validate against your registered JWKS URL. This is two pieces of work, in this order:
Step 3a: Implement the JWKS endpoint
Host a public HTTPS endpoint that returns your Partner JWT public key as a JWKS document, then register the full URL in the Developer Dashboard at Account → General Settings → JWKS URL. The canonical Next.js route used inair-examples is app/api/.well-known/jwks/route.ts:
app/api/.well-known/jwks/route.ts
kid rule, path matrix) is on the JWKS endpoint setup page.
Step 3b: Sign the Partner JWT
With JWKS live and registered, sign your Partner JWT server-side using the matching private key, with akid header that appears in your JWKS. Detailed signing examples for Node.js, Java, C#, and Go are in Partner Authentication.
Step 4: Create Schema for Credential Issuance
Before issuing credentials, you need to create a schema that defines the structure of your credentials. A schema is a blueprint that specifies what data fields will be included in your credentials.Schema Creation GuideFor detailed instructions on creating schemas, including best practices, examples, and schema management, please refer to the Schema Creation Guide.
- Go to the Developer Dashboard.
- Navigate to the Schemas section under Issuer
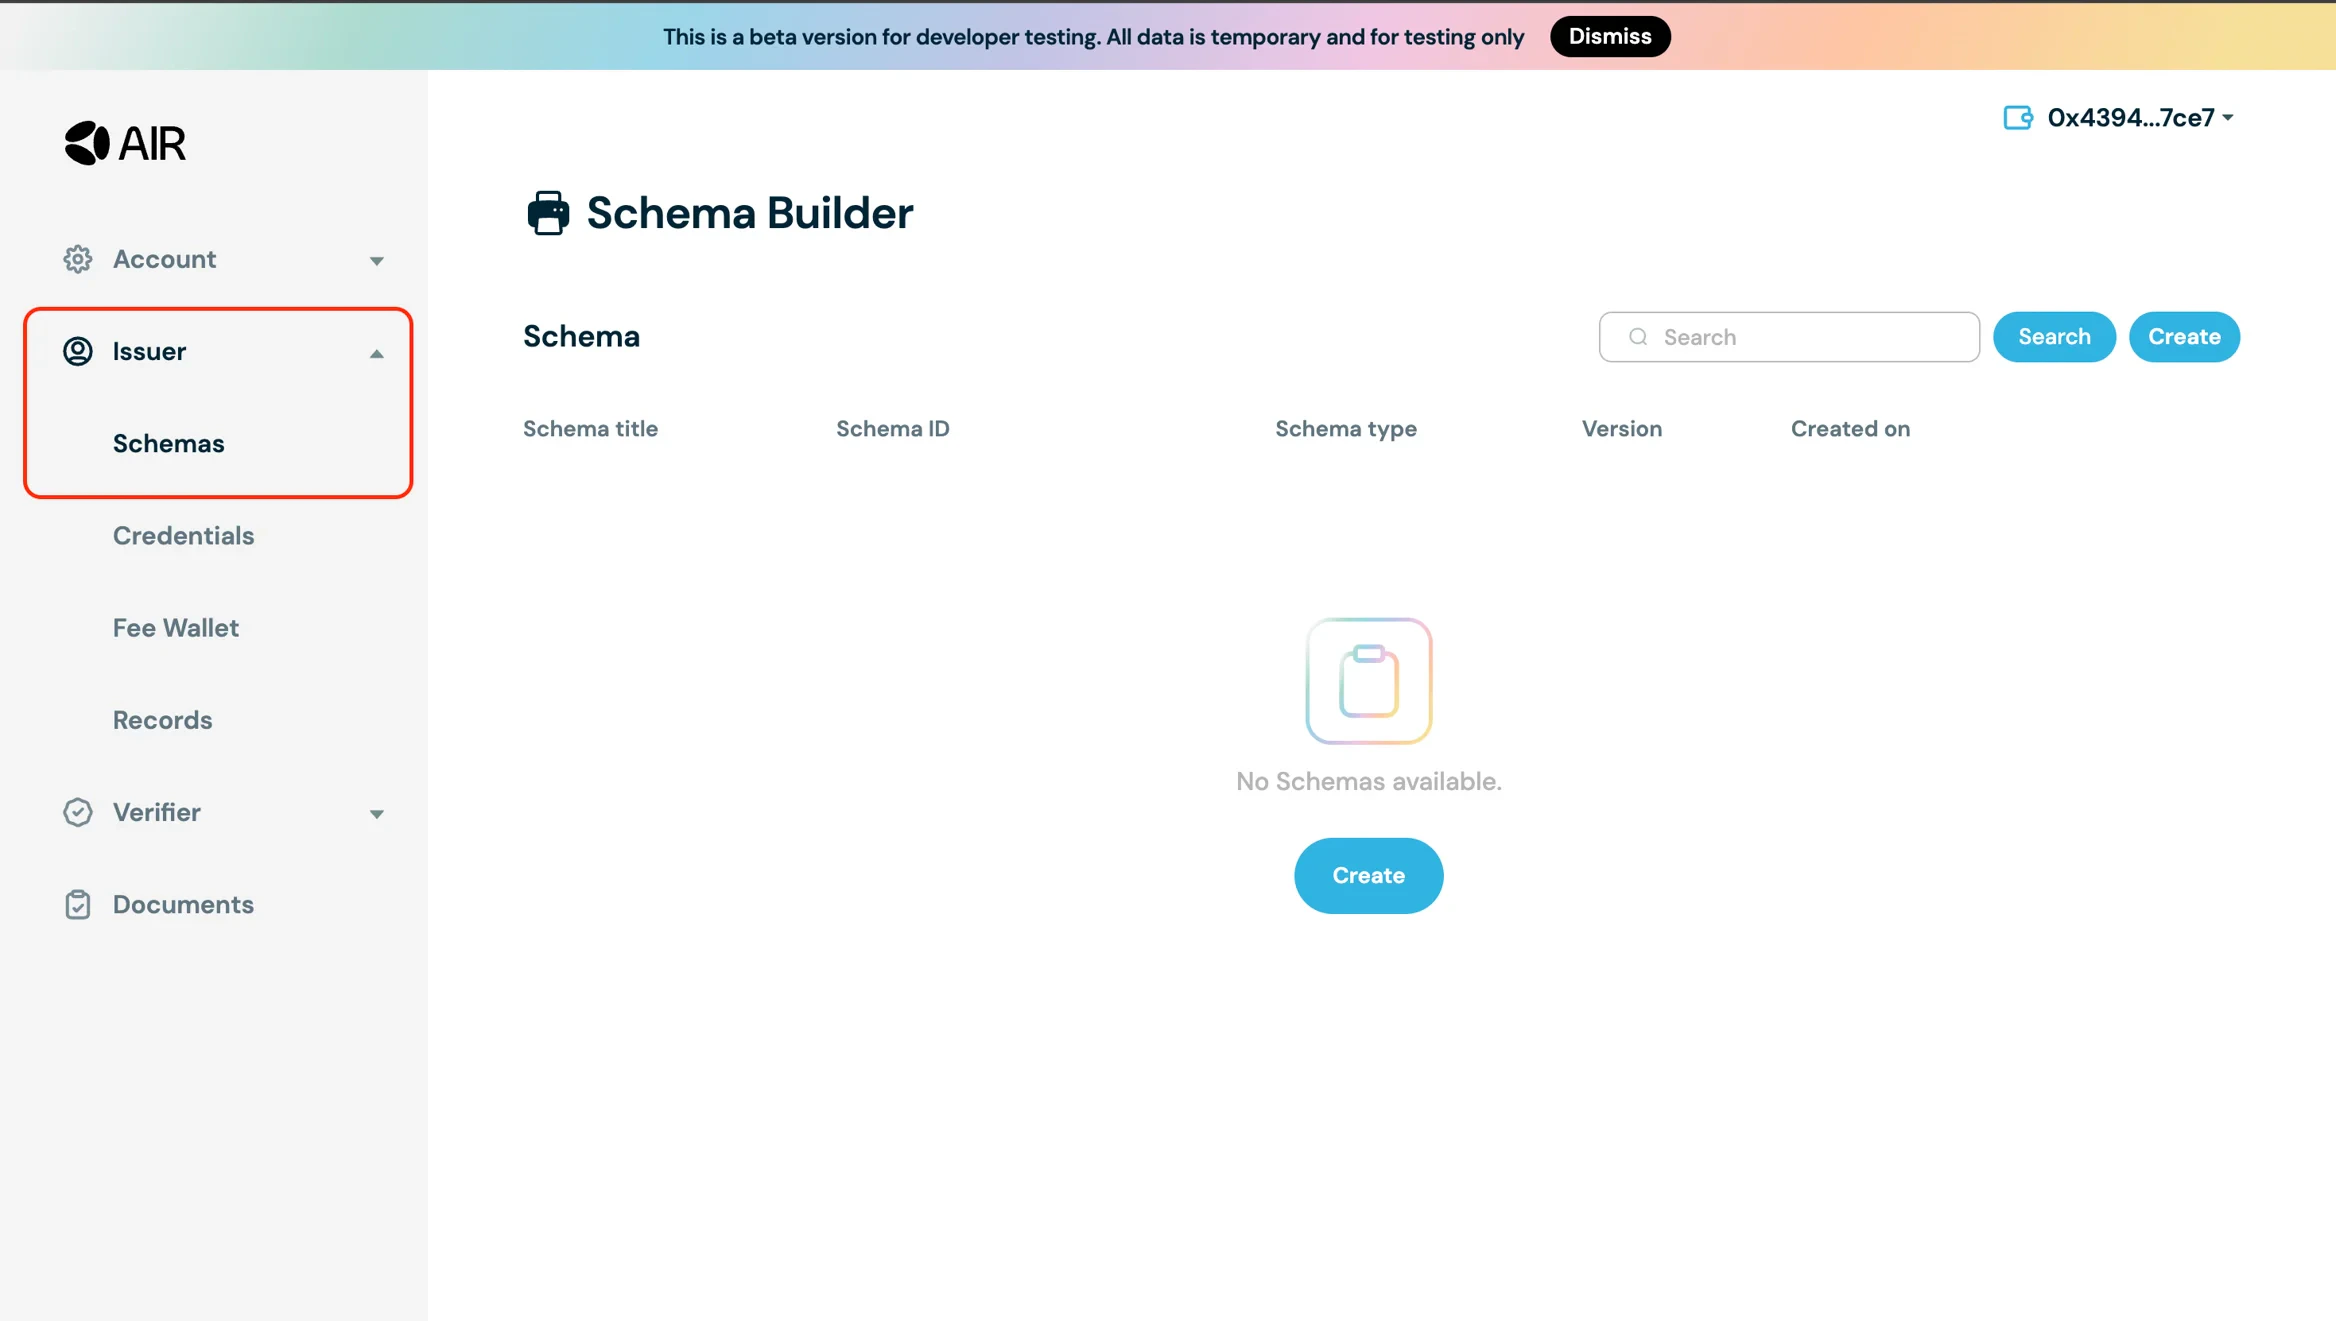
- Create a schema of your choice:
- Input title/schema type/description and click continue
- Click ”+” and add at least one Attribute property
- Click Publish to make it available
- Create credentials (now Programs) to be issued. Navigate to the Programs Section and create the program with the schema you just created
Issuing Credentials
You can issue credentials (programs) using both the SDK and the demo application. Let’s look at both methods.Issuing Credentials Using the Example App
-
Generate a JWT token on the interface

-
Get the configuration details from the Developer Dashboard:
- Issuer DID and Partner ID from the General page under the Account section
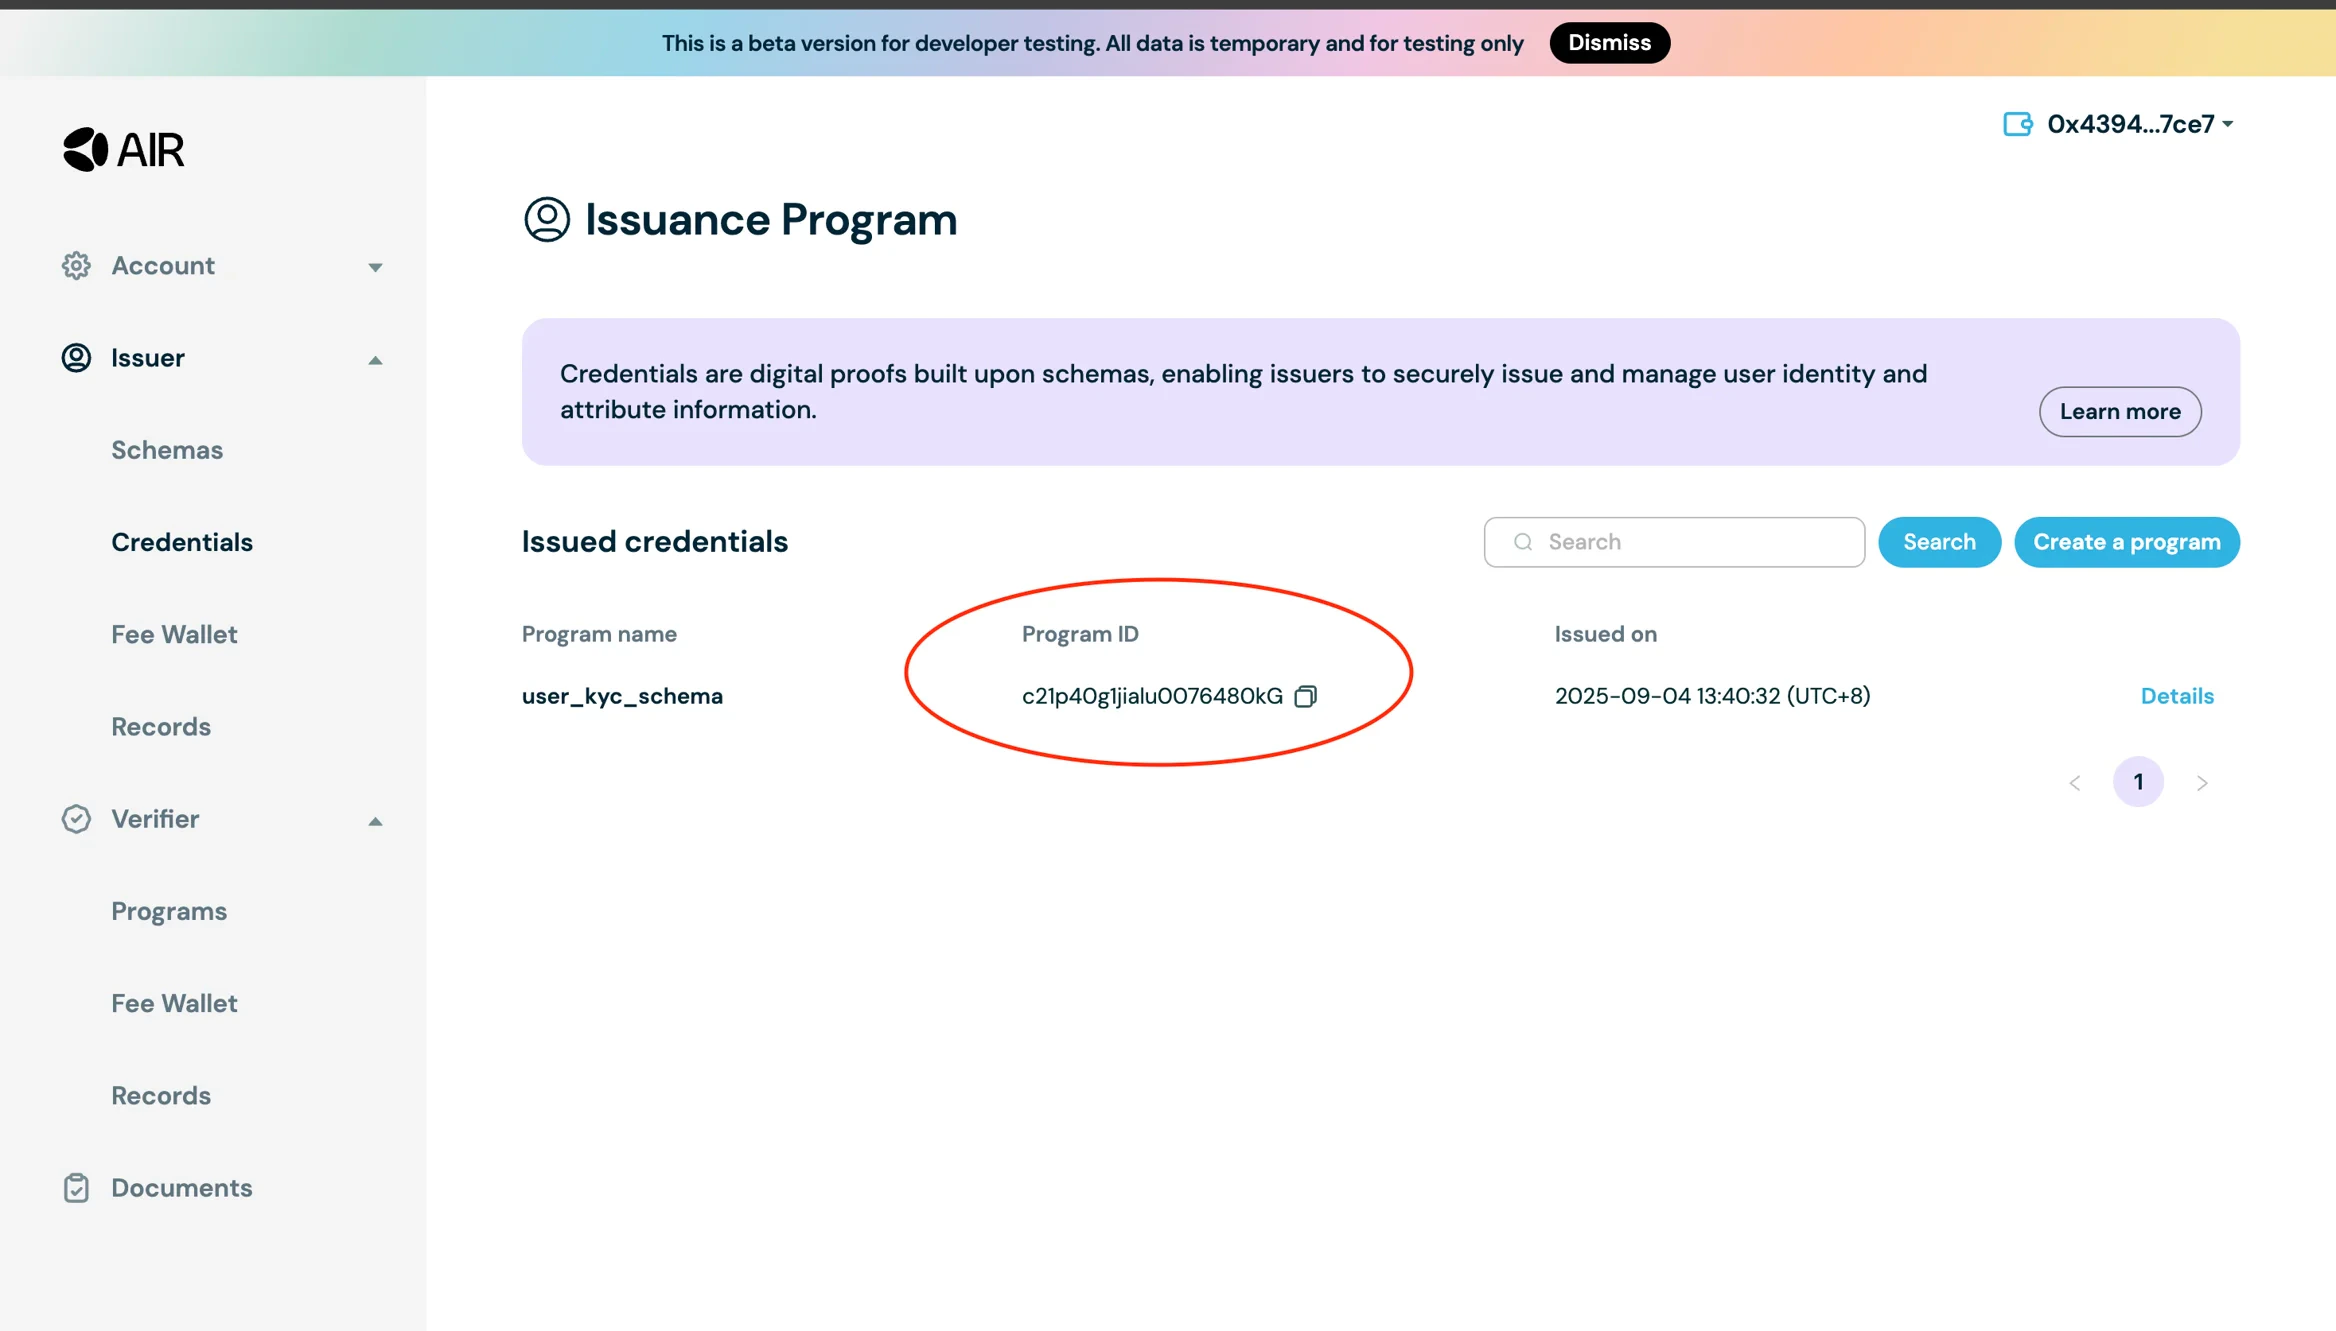
- Issuance program ID from the Credentials section
- Issuer DID and Partner ID from the General page under the Account section
-
Go to the Demo app and enter the Issuer ID, Issuance program ID, and the relevant field names and values
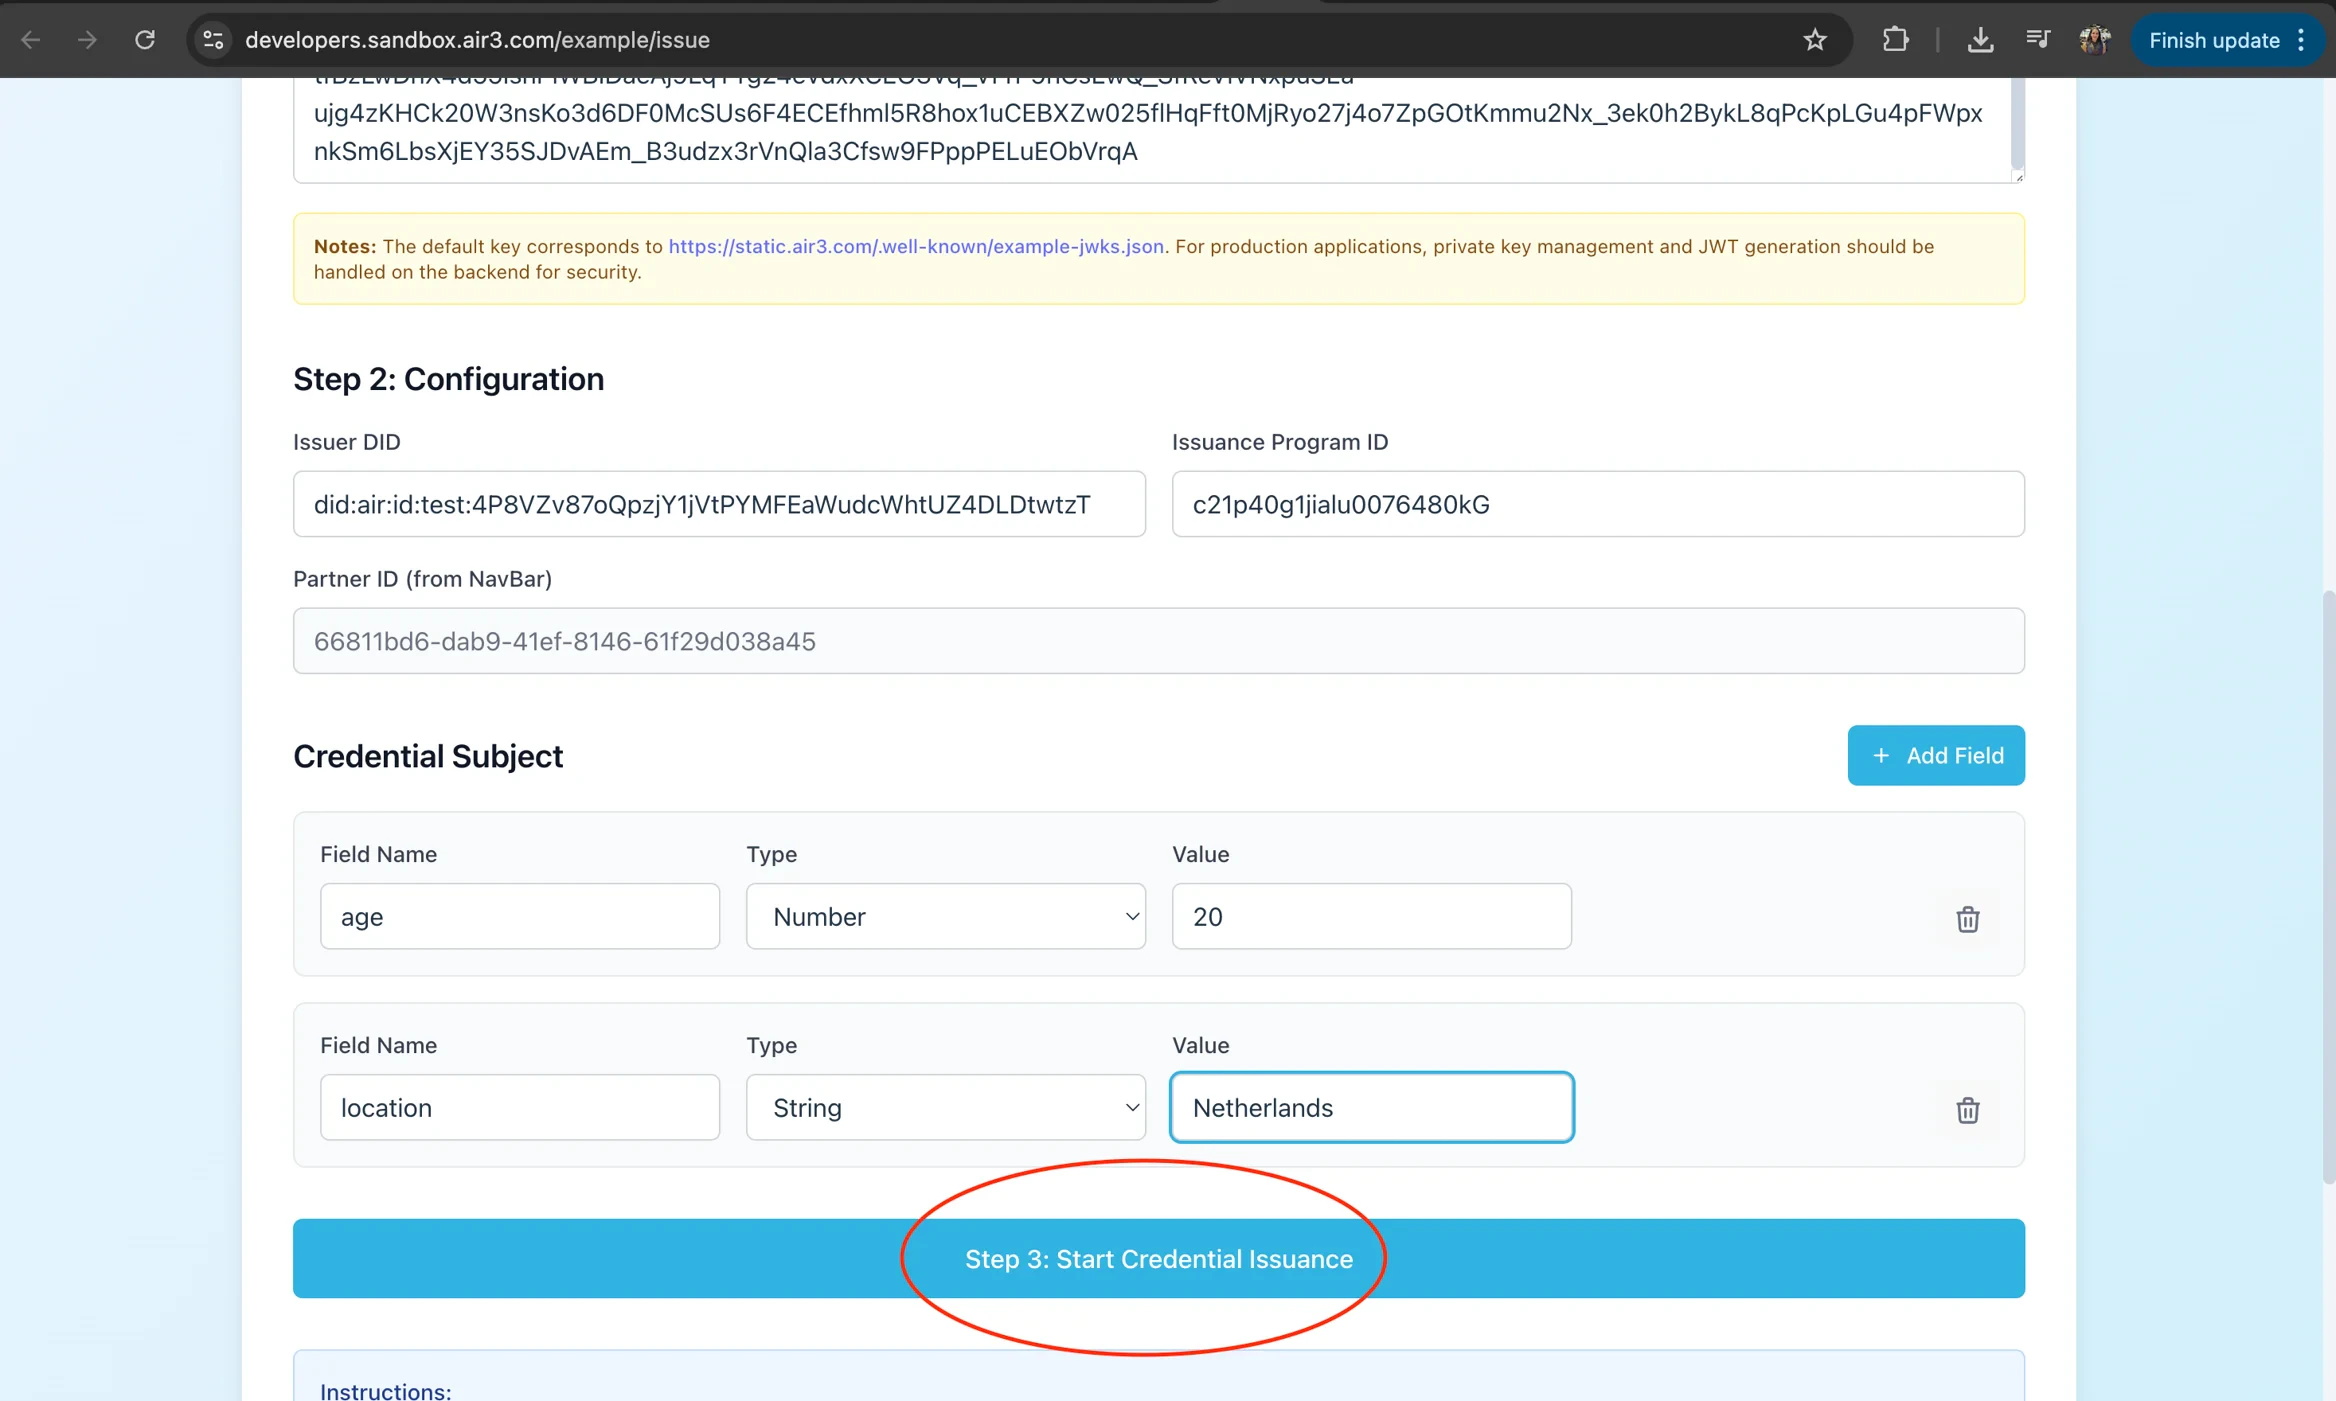
-
Click “Start Credential Issuance”
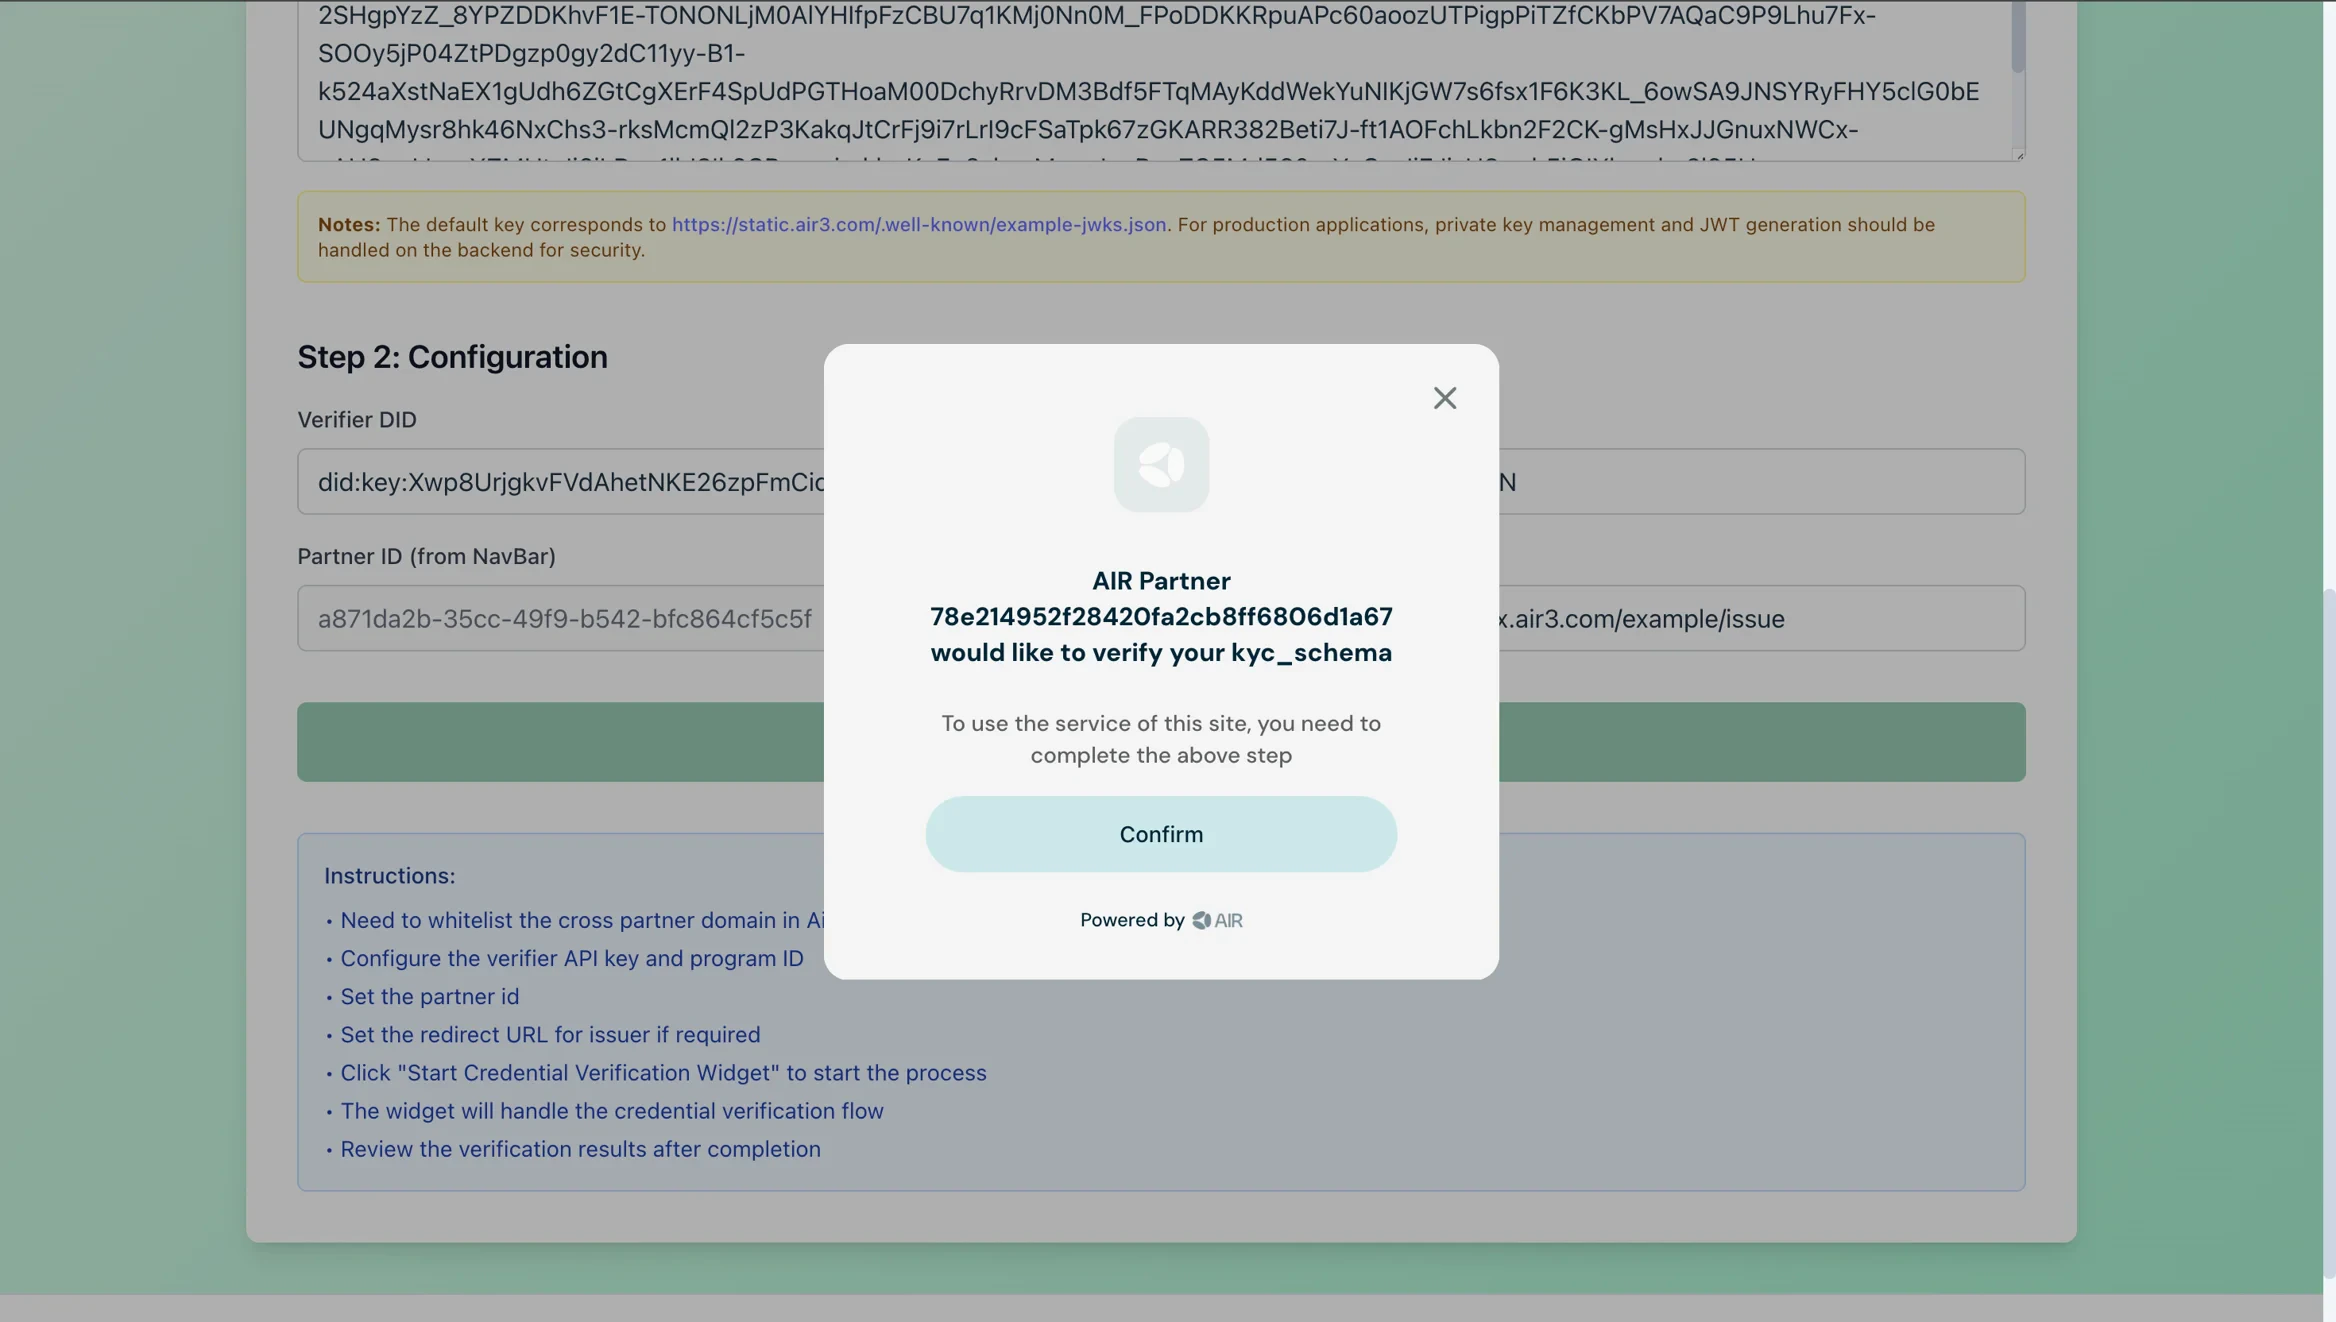
-
The AIR Credential widget will open and guide the user through the issuance process
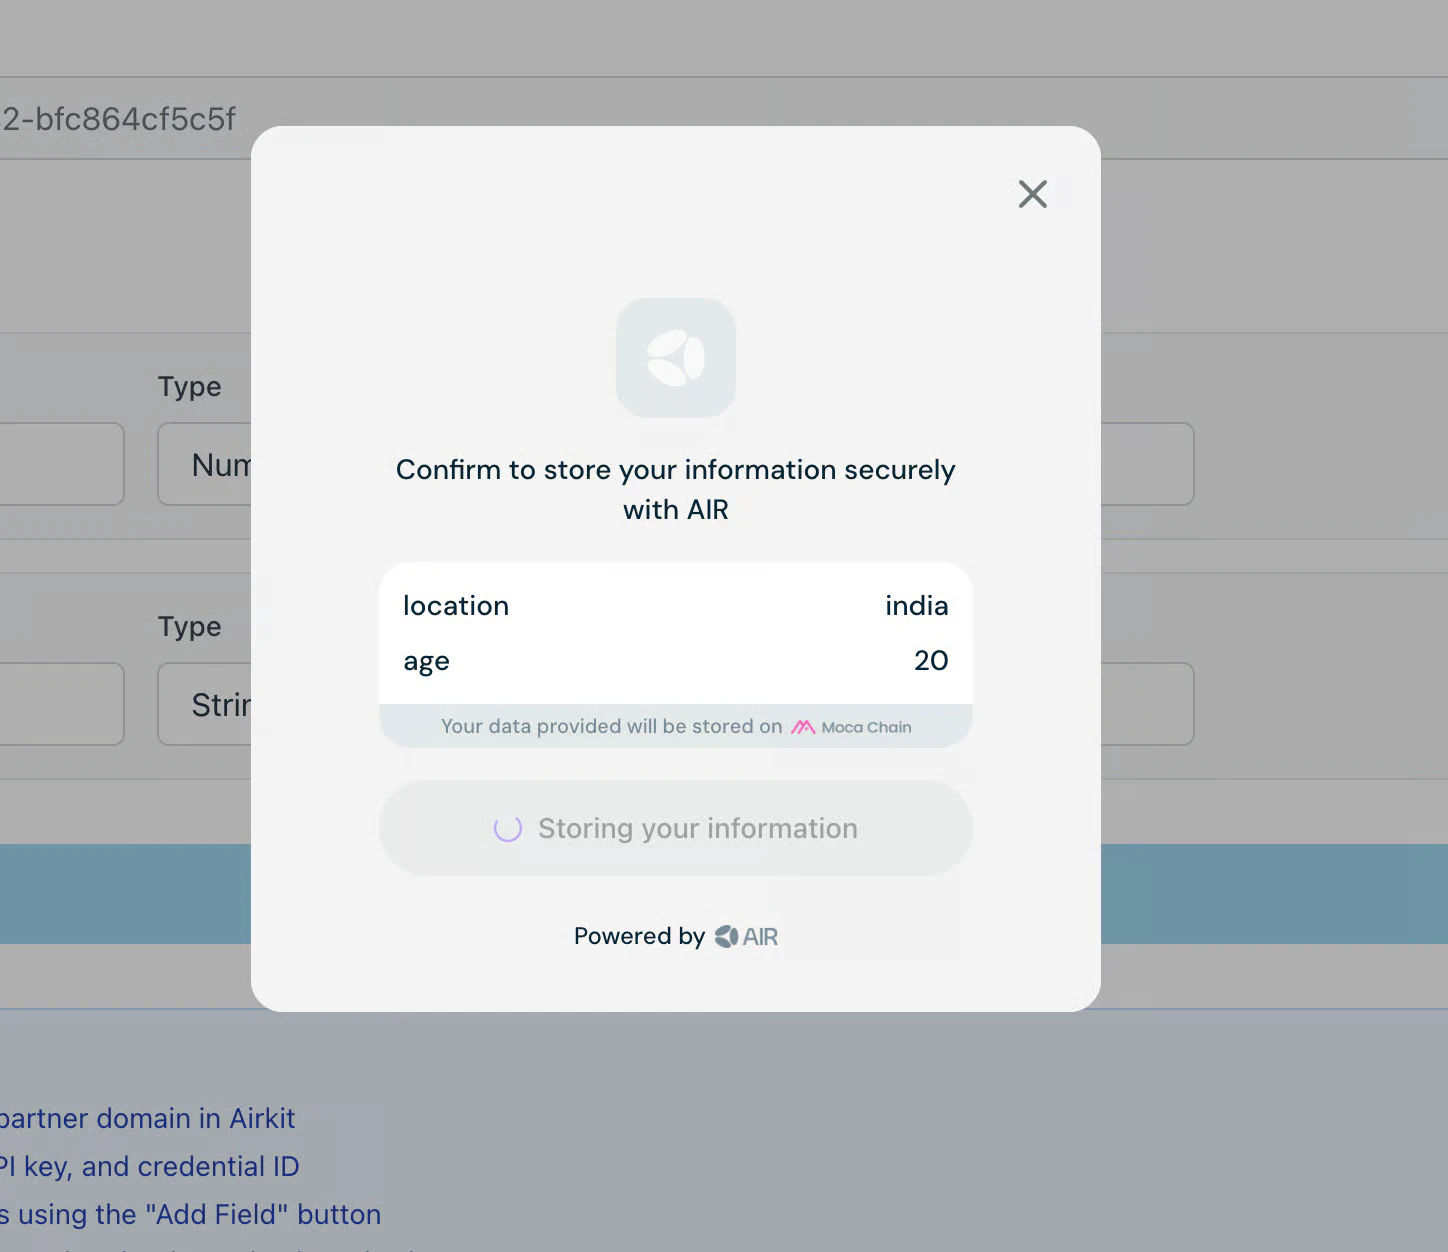
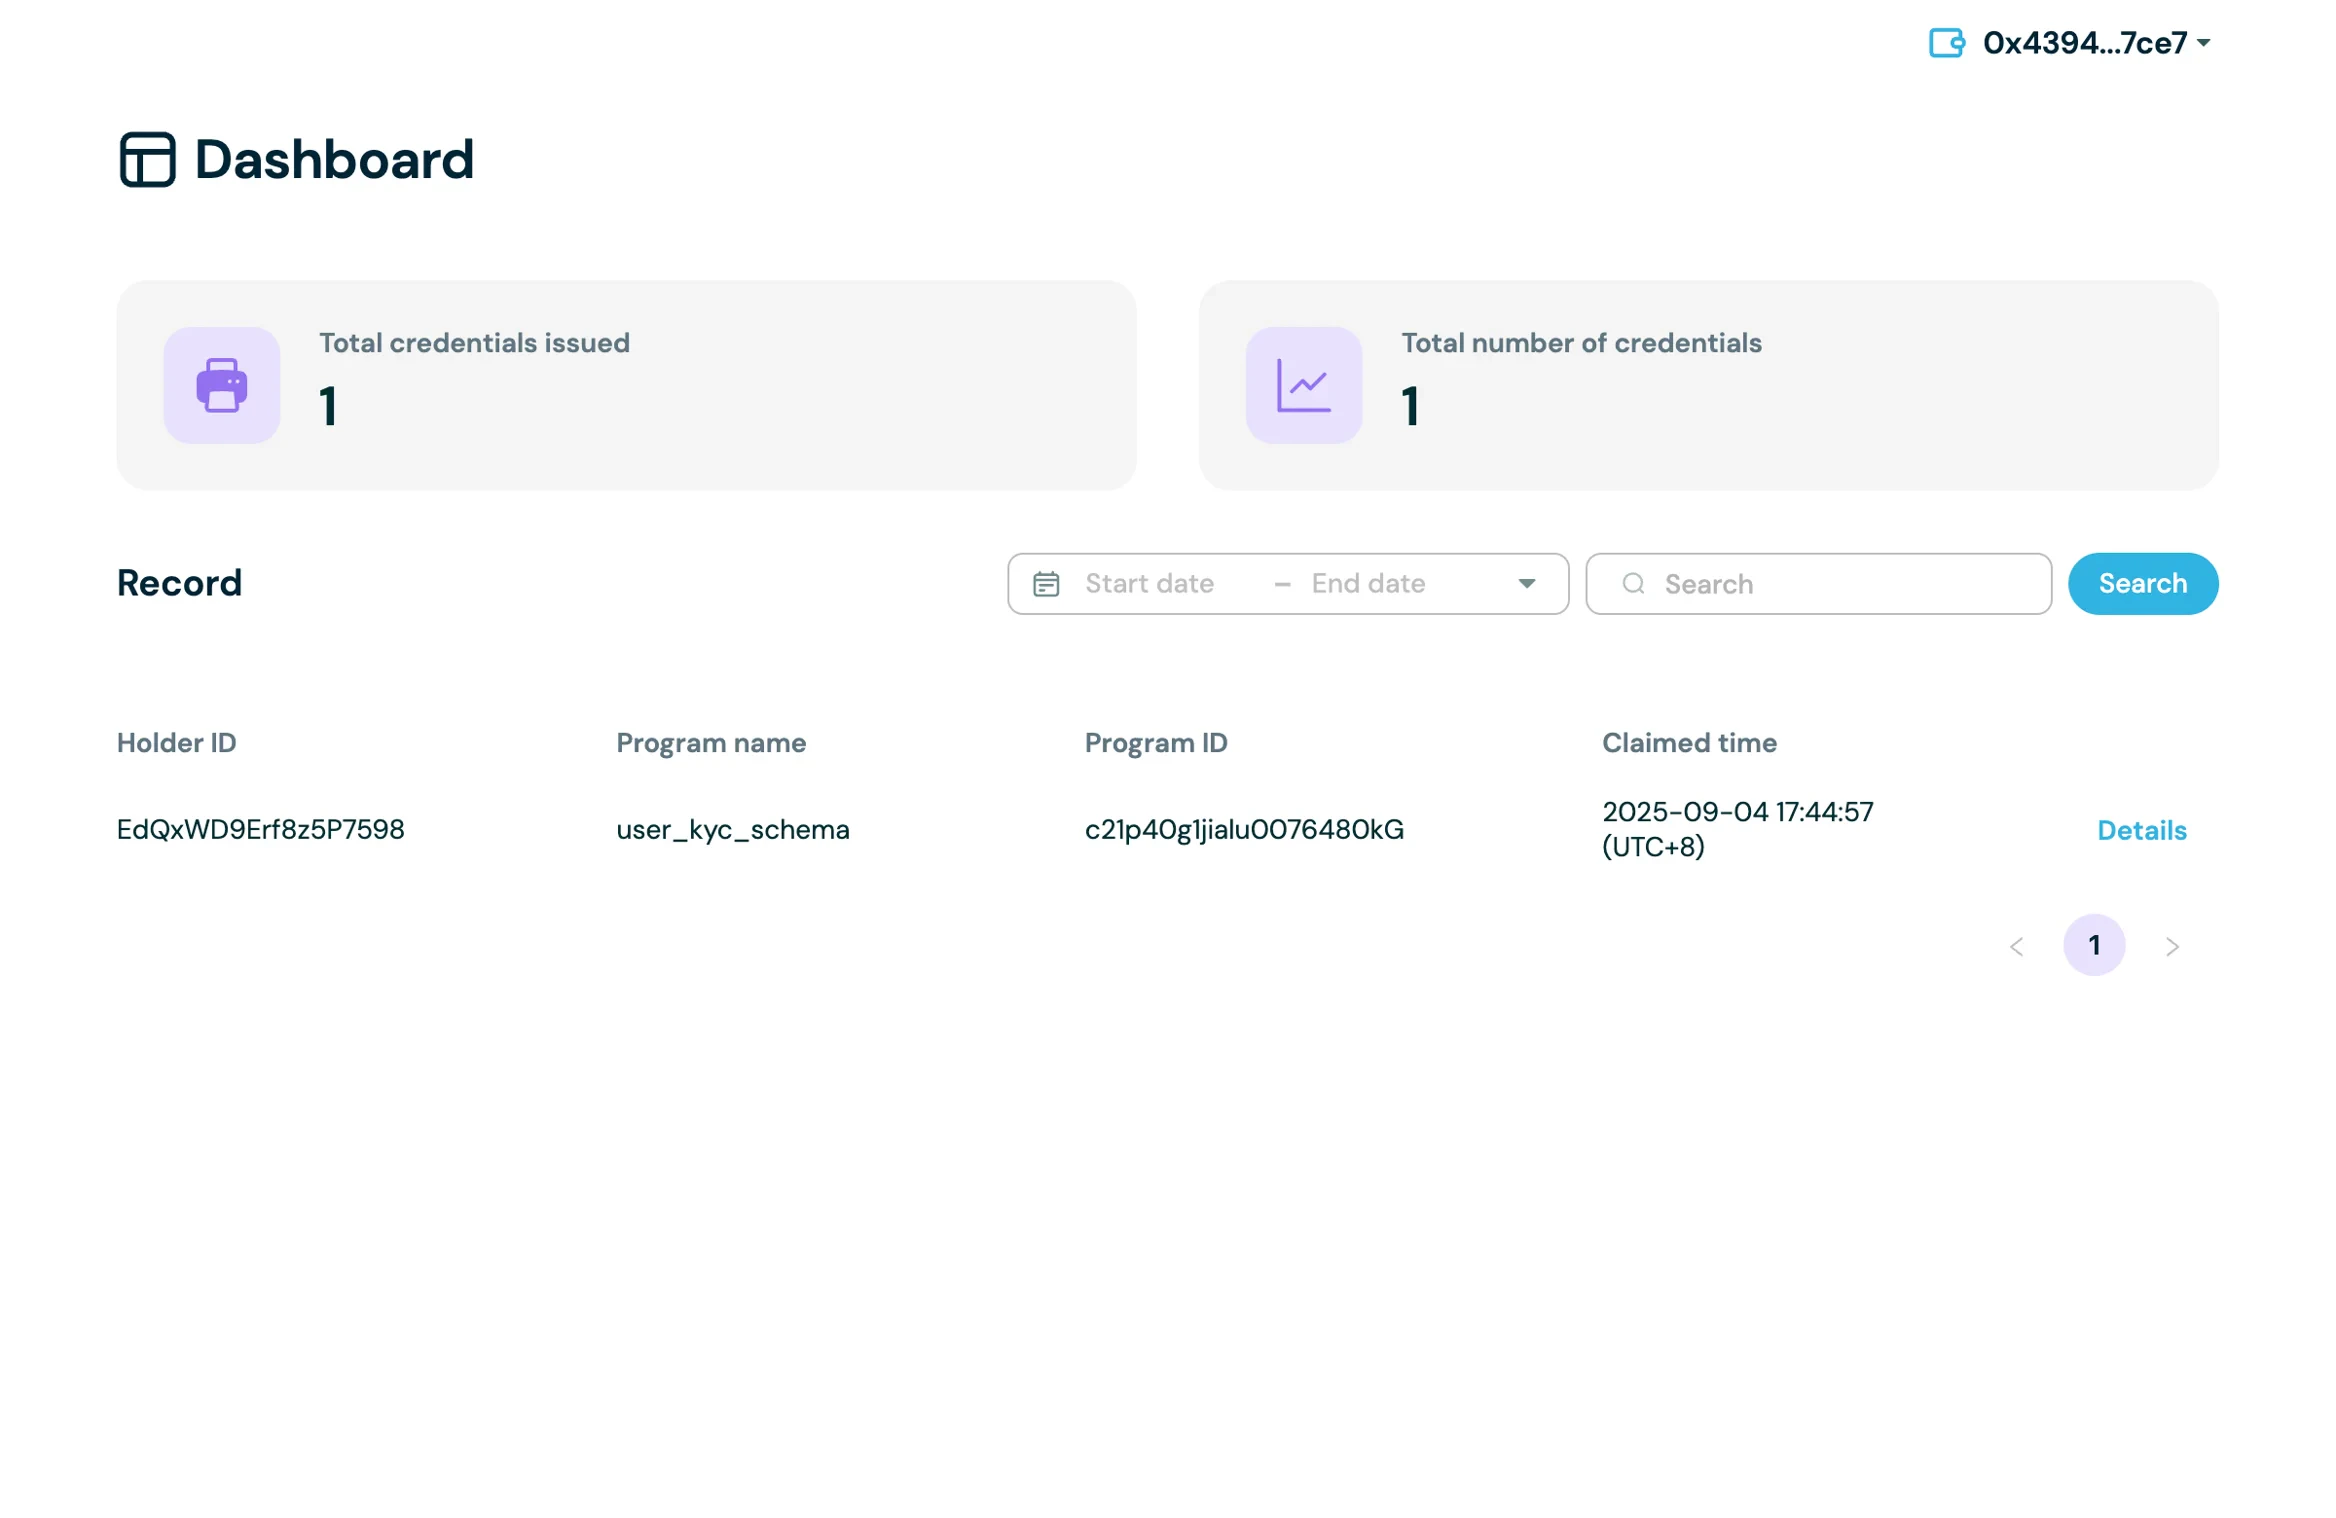
- You’ll receive a success notification when the process completes and can verify the credentials issued under the records section in the Issuer Tab
Issuing Credentials Using the AIR Kit
The AIR Kit provides a convenient way to issue and verify digital credentials directly in your web application using the AIR service. The function handles end-to-end flows, including UI presentation and cryptographic verification, streamlining integration with your decentralized app (dApp).Install the AIR Kit
Initialize the AIR Service
Before issuing a credential, you must create the AirService instance, initialize the service and login the user.Generate the Authentication JWT
Issuance requires an auth token (JWT) to authenticate your service with AIR.generateJwtis a utility function. Refer to Authentication (Partner JWT) on how to generate JWT tokenspartnerIdandprivateKeycome from environment variables- JWT is used for authorization when calling
airService.issueCredentialfunction
Configure Issuance Parameters
Set up the essential credential issuance detailsissuerDid** – Decentralized Identifier of the issuercredentialId– Program ID for the credential created on the Developer Dashboard
Define the Credential Subject
The credential subject contains the data fields issued to the user, e.g., age, location, or email.- Fields can be string, number, boolean, or date.
- The schema for the credential is defined before creating the Issuance program ID on the Developer Dashboard.
Issue the Credential
Call the AIR service to issue the credential:authToken– JWT generated in step 2credentialId– ID of the credential programcredentialSubject– JSON object of the data to populate for the credentialissuerDid– DID of the issuercurve– Optional. Elliptic curve for compliance encryption key generation ("secp256r1"or"secp256k1"). Defaults tosecp256r1.
cakPublicKey (Compliance Encryption User Public Key) when compliance encryption is enabled for your issuance program. See the Issuing Credentials documentation for detailed information about this feature.
On success, the user receives a signed credential that can be stored in their wallet or identity provider.
Handle Issuance Status
The component tracks status for better UX:- Loading – Shows a spinner while issuing the credential
- Success – Displays a success message when the credential is issued
- Error – Shows any errors if issuance fails
- Initialize AirService with environment config and partner ID
- Generate a JWT for authentication
- Configure issuer DID and issuance program ID on the Developer Dashboard
- Add credential subject fields (dynamic data)
- Call
airService.issueCredentialto issue the credential - Handle success or error states
Example Implementation
For a complete working example, check out the AIR Credential Example repository which demonstrates:- Full credential issuance flow with React components
- Dynamic credential subject field management
- Error handling and status management
- Complete integration with the AIR Kit’s Credential Services
Next Steps
Now that you know how to issue credentials, you can:- Verify credentials - Learn how to verify the credentials you’ve issued in the Credential Verification Quickstart